Note : I will not mention it every time but starting from this lab, I always make these modifications to the scripts when necessary :
change the region from us-east-2 to us-east-1 as it was asked by the professor
when necessary, change the AMI to ami-068c0051b15cdb816
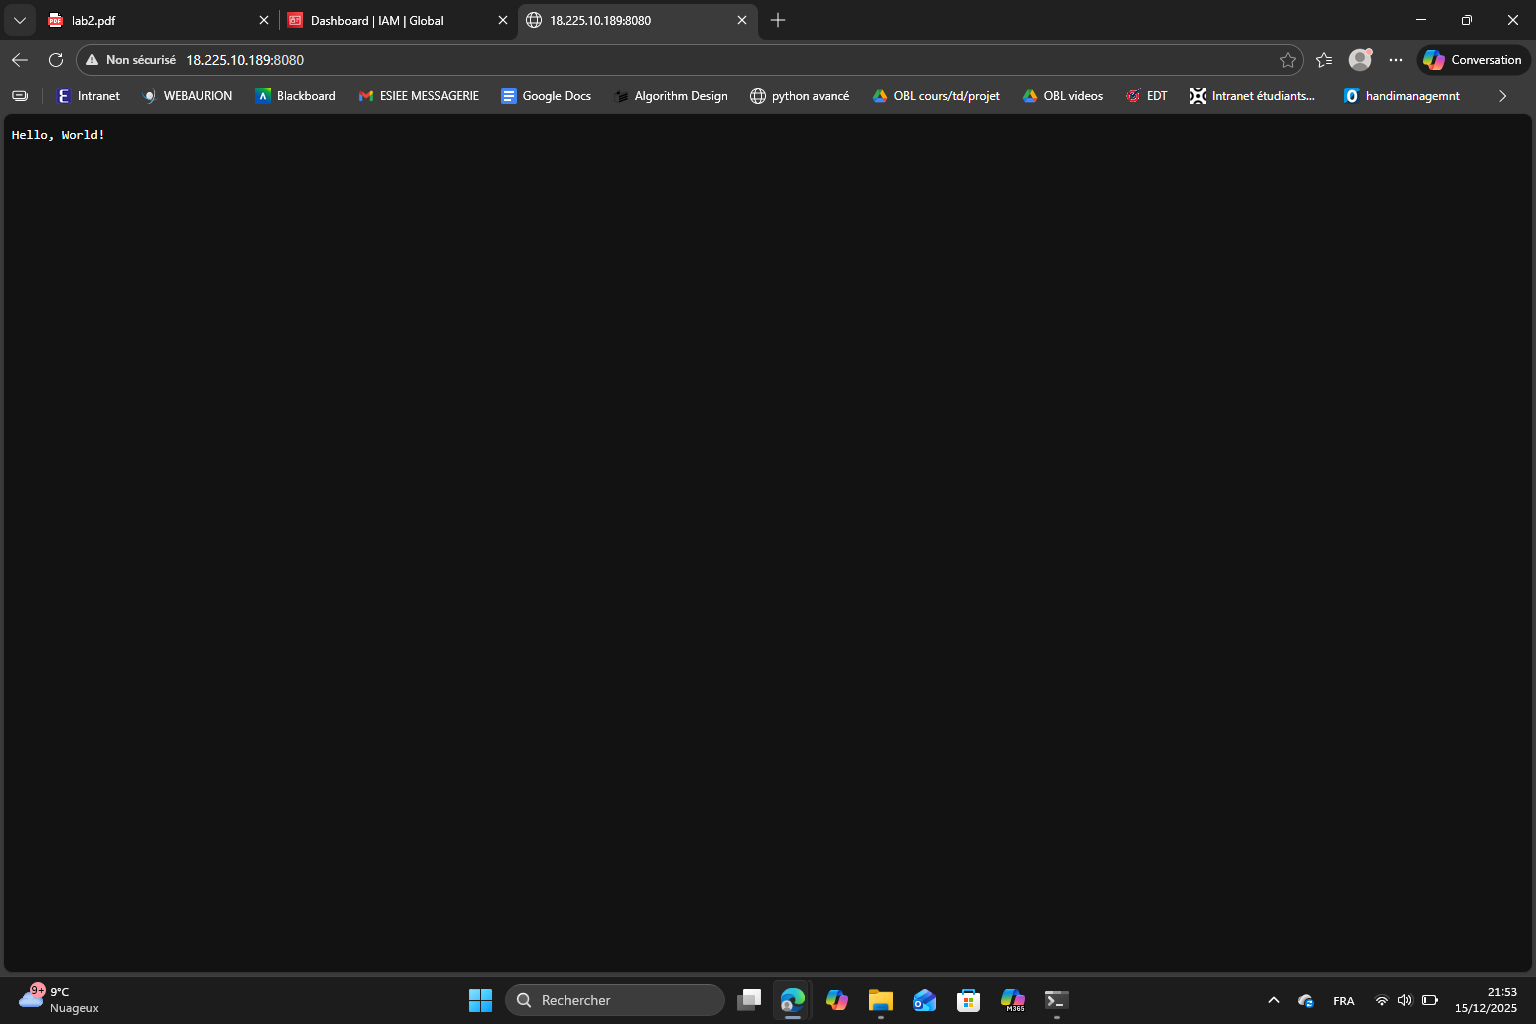
change the port from 80 to 8080 because the app.js is listening on port 8080
change from t2.micro to t3.micro as it offers more performances and is a better choice for the region I picked
Objective: In this lab, the goal is to learn how to manage infrastructure using Infrastructure as Code (IaC). Instead of configuring the servers manually, we will use code to automate the processes and therefore deploy infrastructure in a more efficient way.
Section 1 : Authenticating to AWS on the Command Line
The goal of this section is to authenticate to AWS through the command line using access keys. This authentication will always be required to interact with AWS through the command line in the future sections.
First, I logged in to the AWS Management Console → IAM Console and selected my IAM user and went to the security credentials tab. Then, I created a new access key for command line interface usage. AWS provided two credentials which I saved as it only shows them once :
Access Key ID
Secret Access Key
After generating the access key I configured my terminal by setting the environment variables using :
These variables allow AWS tools to authenticate automatically through my terminal. It is important to note that these variables are only valid for the current terminal session so if the terminal is closed, the variables must be indicated again.
Section 2 : Deploying an EC2 instance using a Bash script
The objective of this section is to deploy an EC2 instance running a Node.js application using Bash script and the AWS CLI.
First I created a directory for the Bash scripts as it was asked and I created a new user-data.sh file. I made sure to change the GitHub URL to mine.
Then I created the Bash script. I made some changes in the script provided in the lab material :
changed the region from us-east-2 to us-east-1
changed the port from 80 to 8080
changed from t2.micro to t3.micro
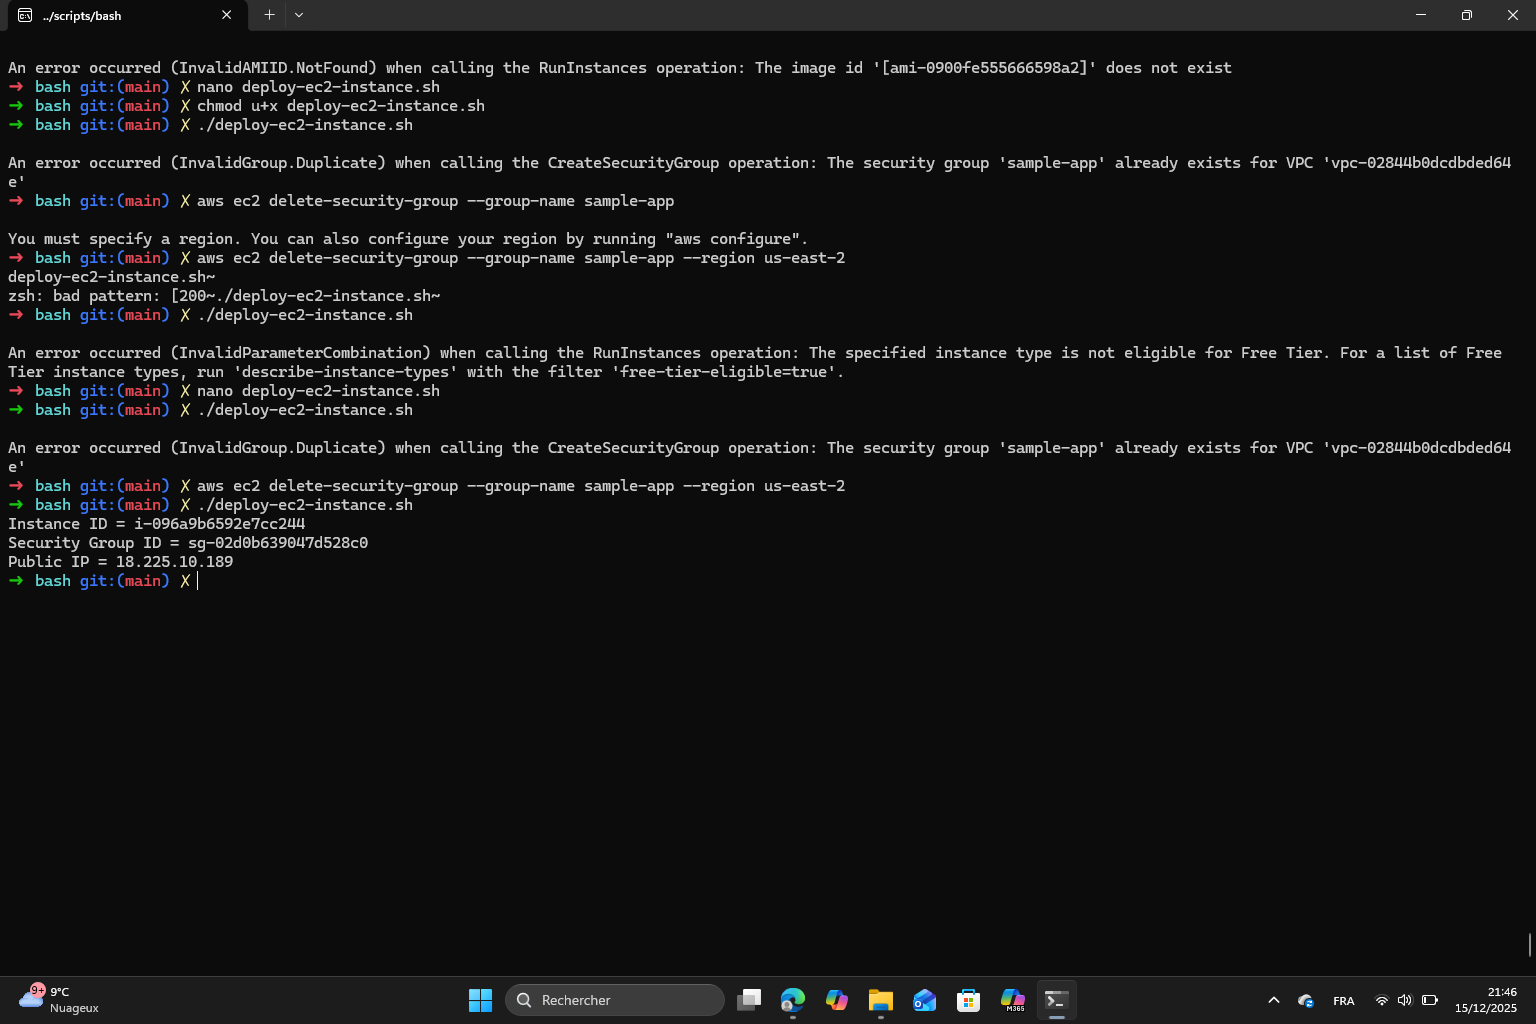
Finally, I made the script executable and executed it.
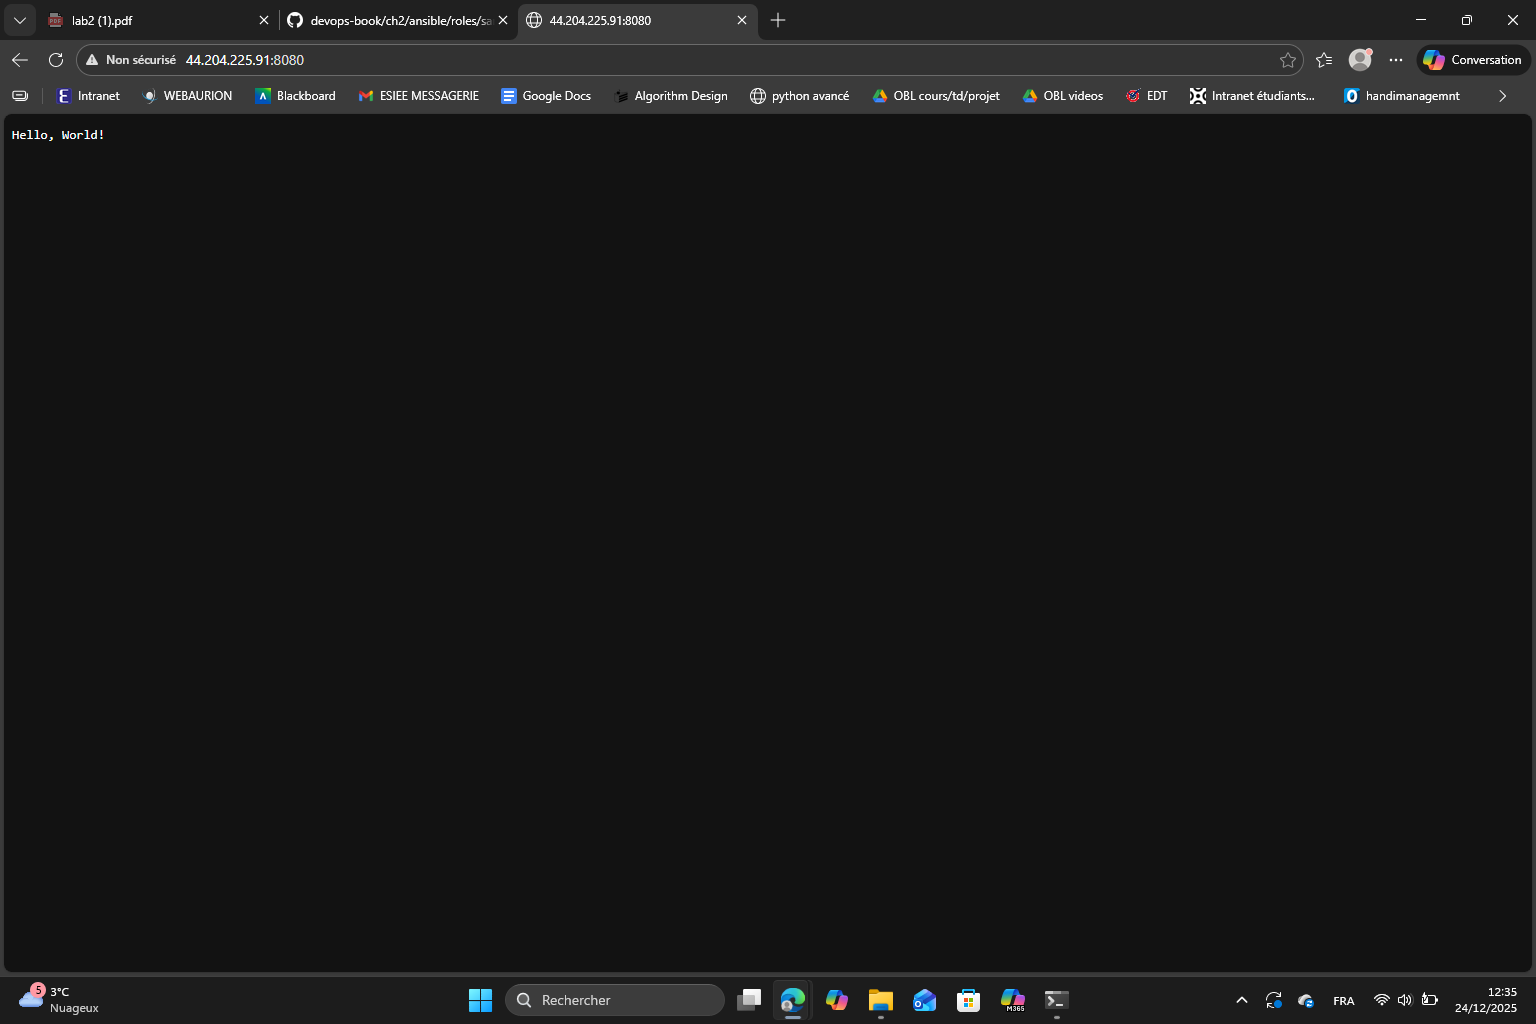
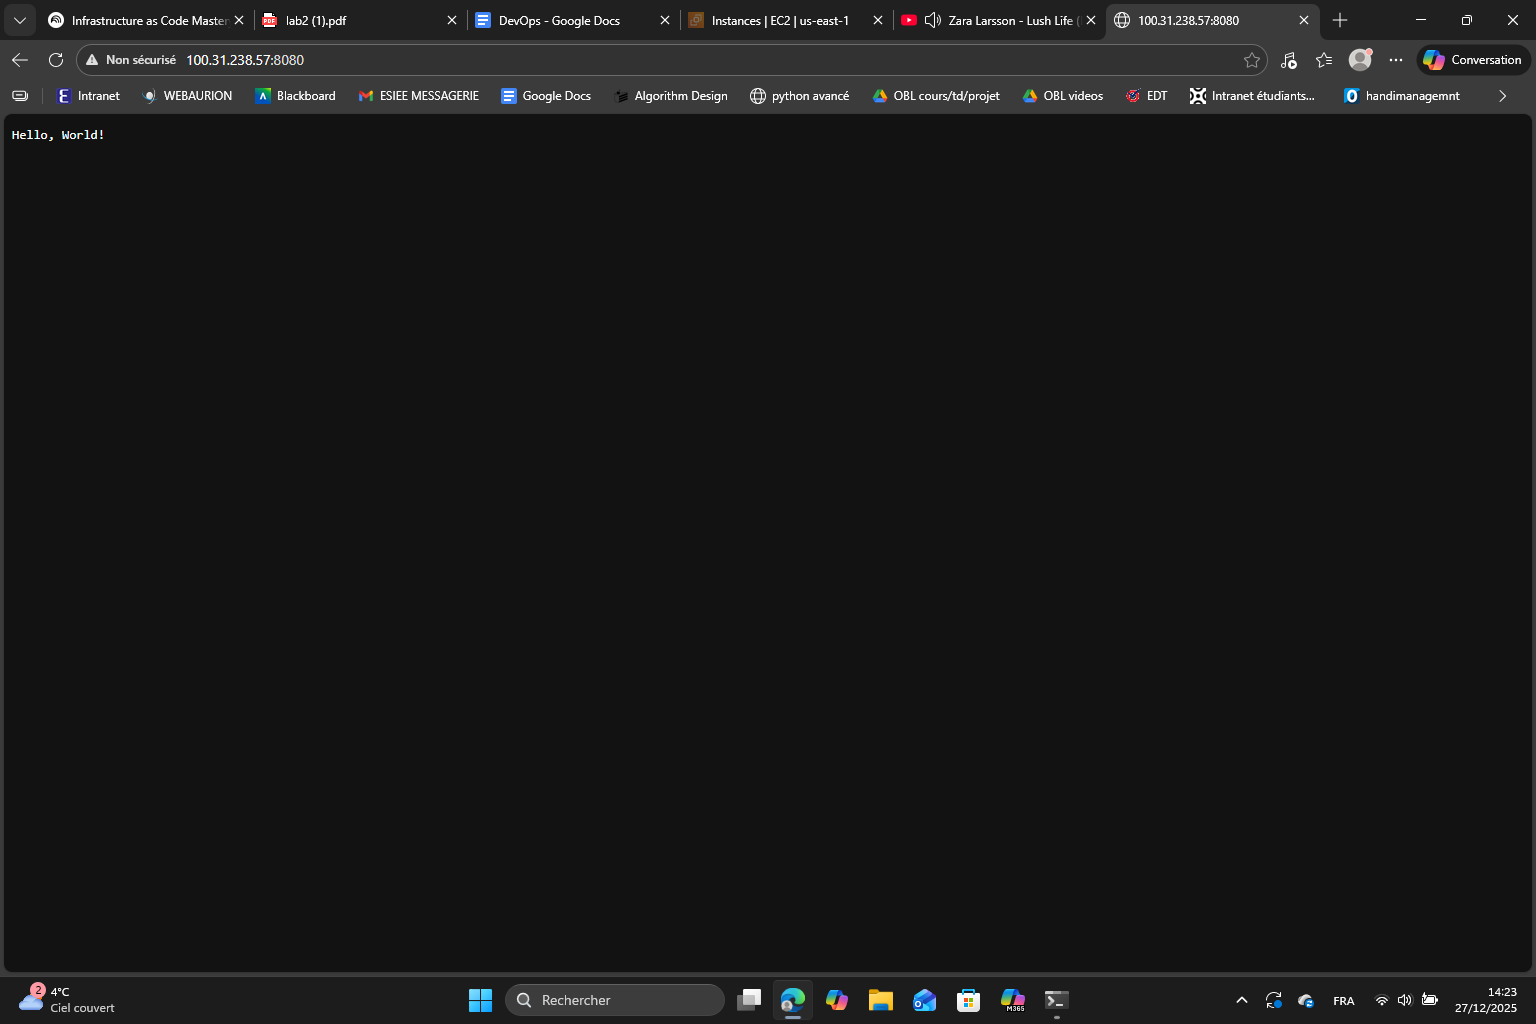
Because we’re using port 8080 and not the default port 80, we have to specify it like this http://<Public IP>:8080
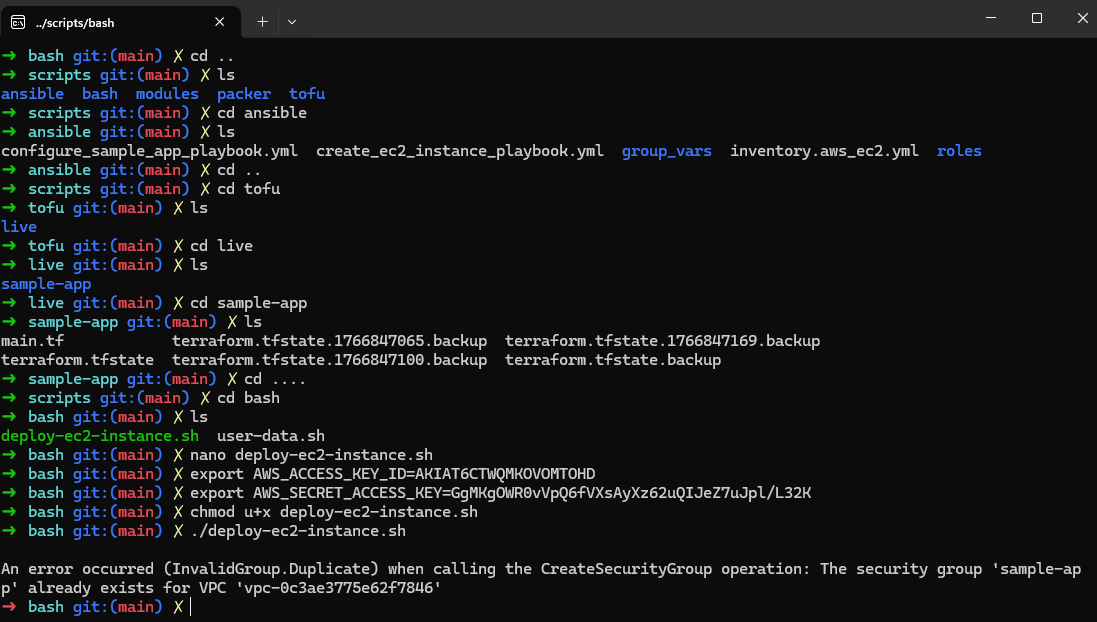
Exercise 1 : running the script a second time results in an error because AWS requires the security group name and other resources to be unique. This is a real limitation of the ad hoc scripts.
Exercise 2 : to deploy multiple instances, we can use loops and unique names for the resources. For example, I generated this code using AI, it goes in the #launch an EC2 instance part :
for i in 1 2 3; do instance_id=$(aws ec2 run-instances \ --image-id "ami-0900fe555666598a2" \ --instance-type "t3.micro" \ --security-group-ids "$security_group_id" \ --user-data "$user_data" \ --tag-specifications "ResourceType=instance,Tags=[{Key=Name,Value=sample-app-$i}]" \ --query "Instances[0].InstanceId" \ --output text) echo "Launched instance $i: $instance_id"done
Finally, I terminated the EC2 instance and removed the created resources.
Section 3 : Deploying an EC2 instance using Ansible
In this section, the goal is to use Ansible to deploy and configure an EC2 instance running the Node.js sample app.
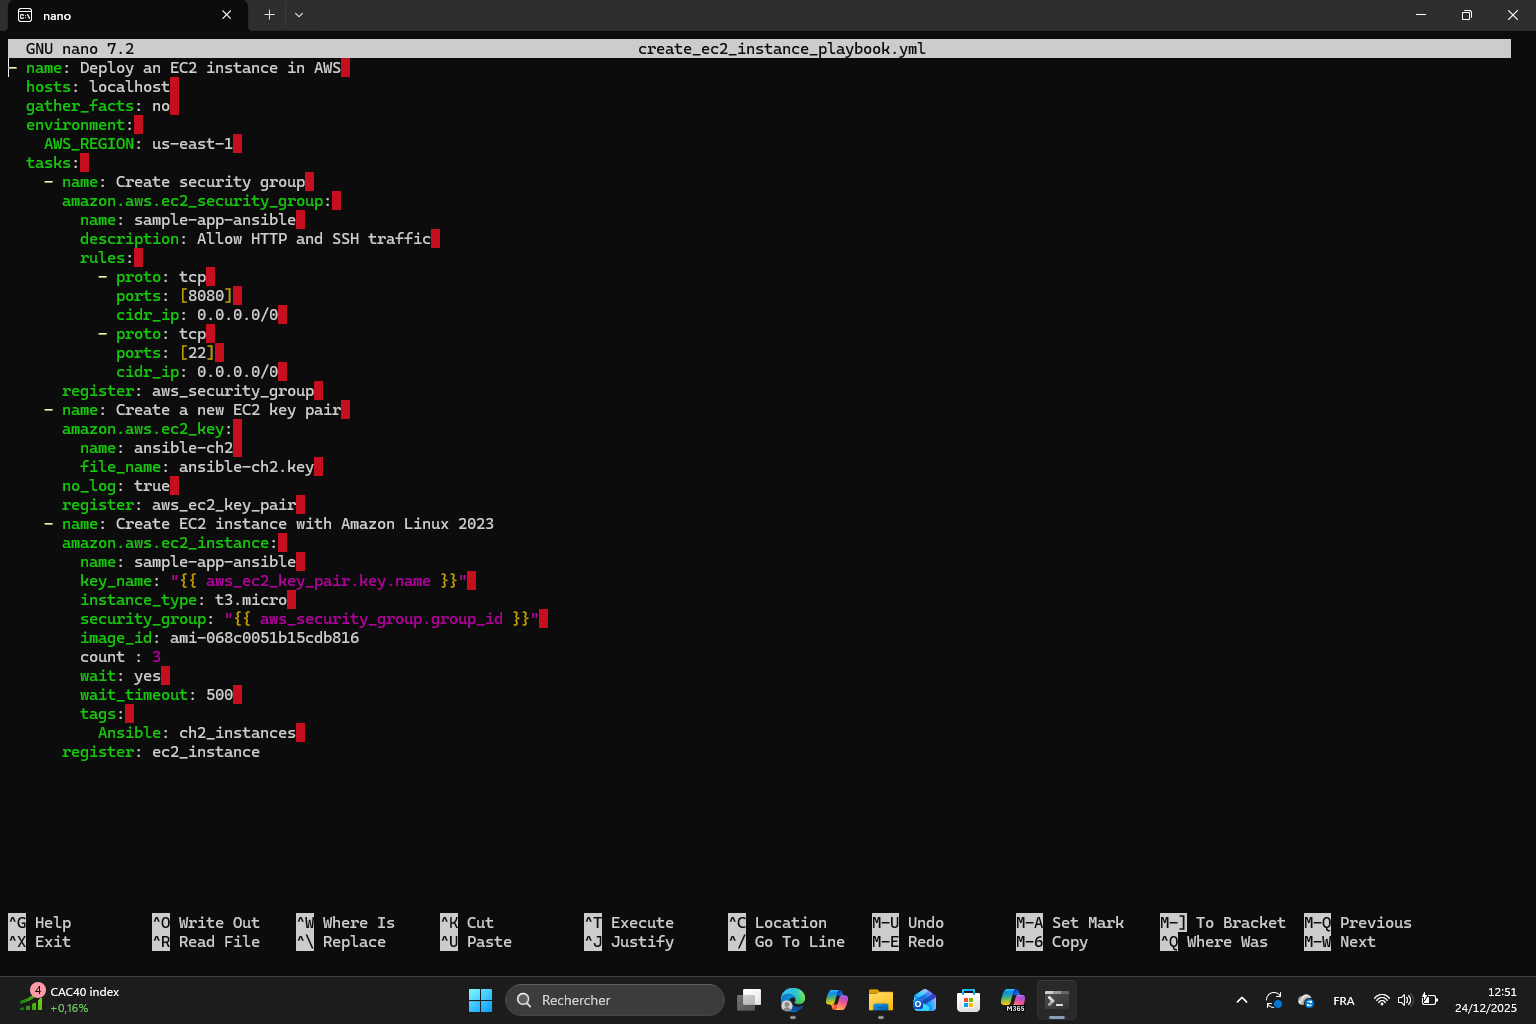
First, I created the directory structure for the Ansible scripts then I created the EC2 deployment playbook. Just like I did in section 2, I changed the region to us-east-1, the AMI and the t2.micro to t3.micro.
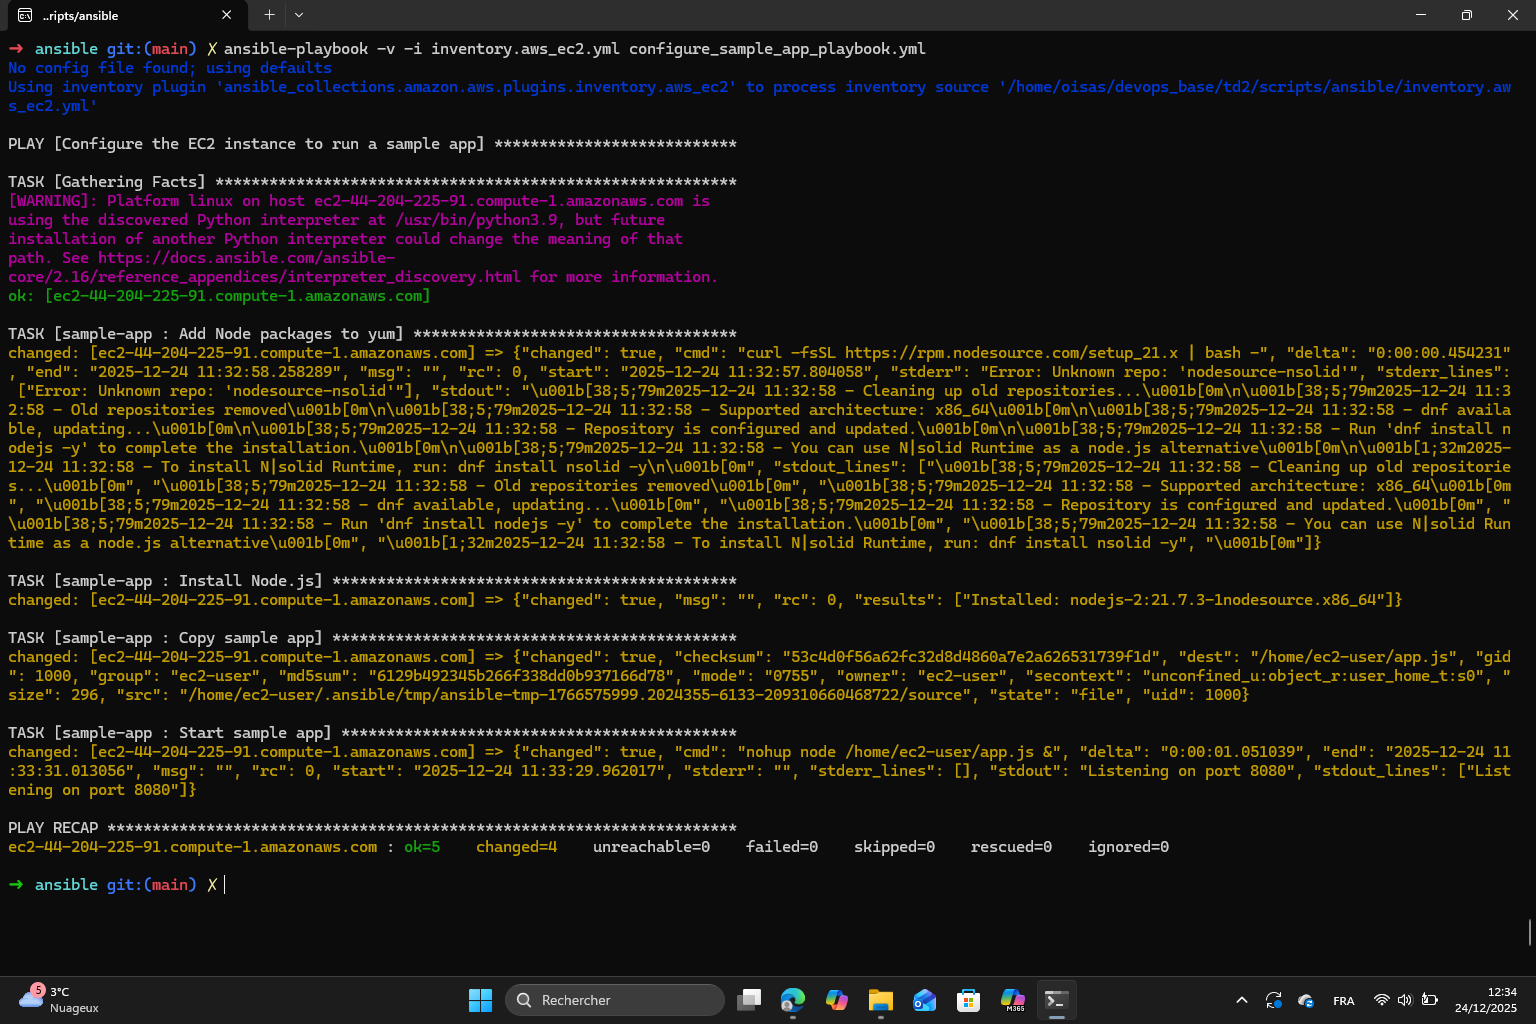
I ran the playbook then I followed all the instructions : set up the ansible inventory, created the group variables, the configuration playbook and the ansible role.
Finally I ran the configuration playbook. What I understand is that Ansible now installs Node.js, copies the sample app and starts it on the EC2 instance.
However, I had an error related to the AMI. In the lab1, we picked the default AMI but now it doesn’t work anymore so I changed it to use Amazon Linux 2023 kernel-6.1 AMI which is : ami-068c0051b15cdb816. I also had to update the node.js setup script from:
Exercise 3 : Ansible tasks are idempotent meaning that running a task multiple times will not change the outcome after the first run. This is achieved thanks to the creates parameter that is located in the Ansible role task file. We can see here that compared to the Bash script, Ansible allows idempotent automation which makes it more reliable.
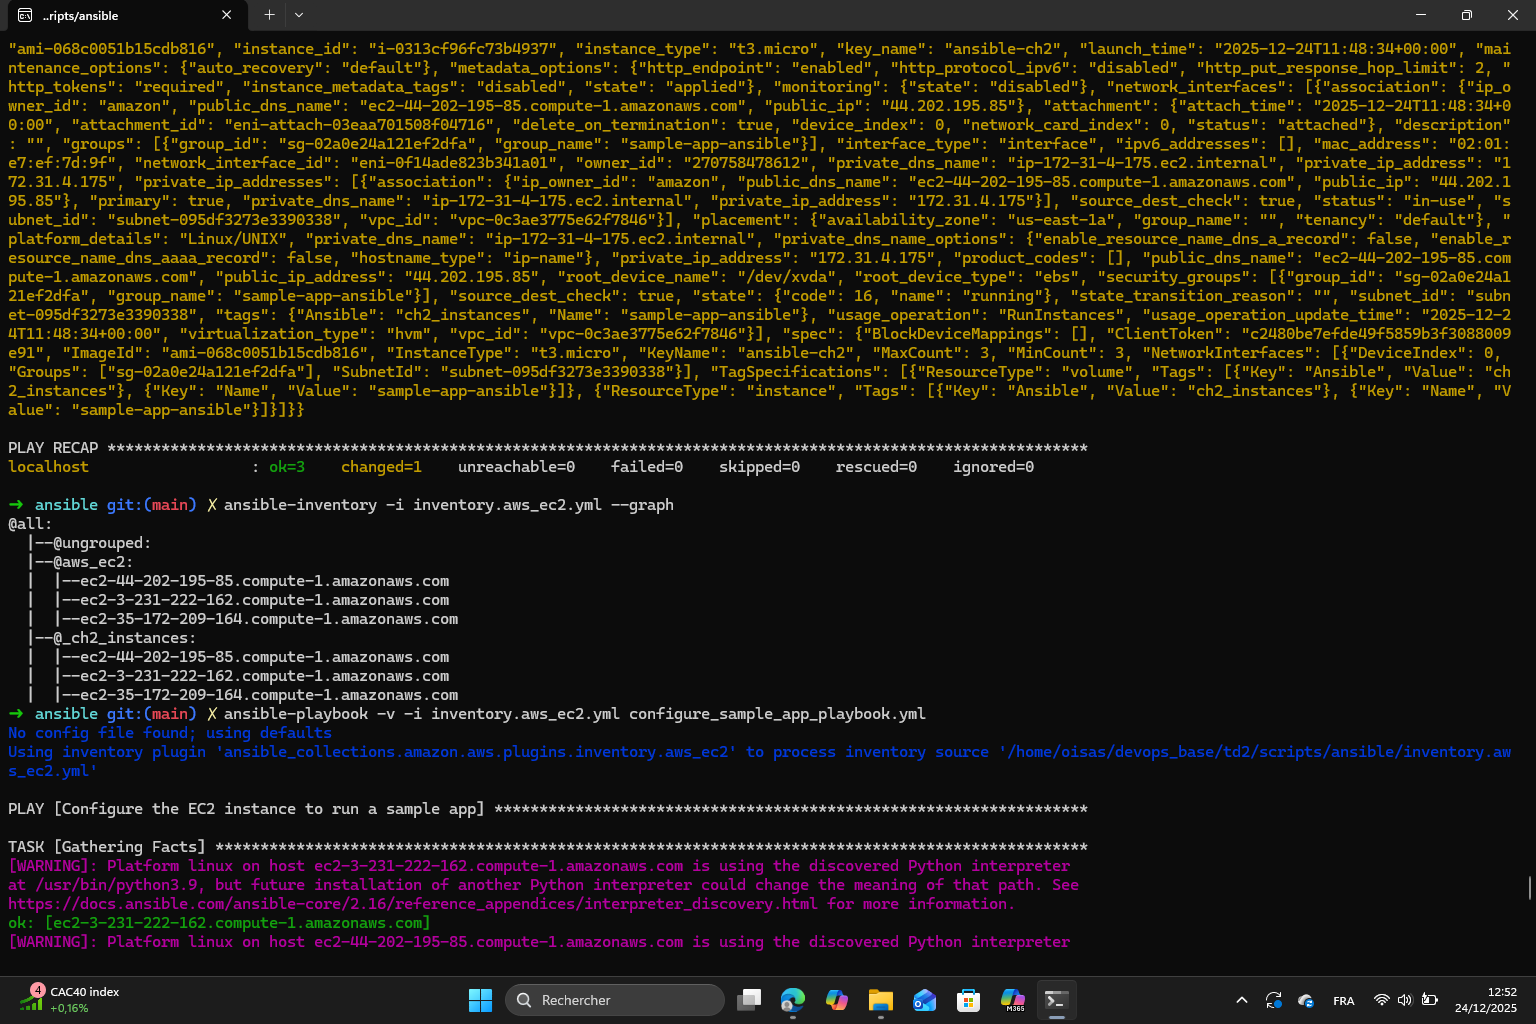
Exercise 4 : I started by killing the instance then I modified create_ec2_instance_playbook.yml to add a parameter count = 3 to be able to create 3 instances.
Then I ran the playbook and checked the inventory thanks to the command:
I configured the instances and obtained 3 IPs for each instance which I used to open the app outputs :
Finally I did the cleanup part.
Note : I also forgot to mention that at some point in this section, I had an error because Ansible was adding an extra _ to the group name from AWS tags. My playbook was looking for ch2_instances but Ansible created _ch2_instances. To fix it, I added a prefix "" in the inventory file so that the group name matches and the playbook worked :
keyed_groups:
  - key: tags.Ansible
    prefix: ""
Section 4 : Creating a VM using Packer
The goal of this section is to create an AMI using Packer which has our Node.js sample app pre-installed.
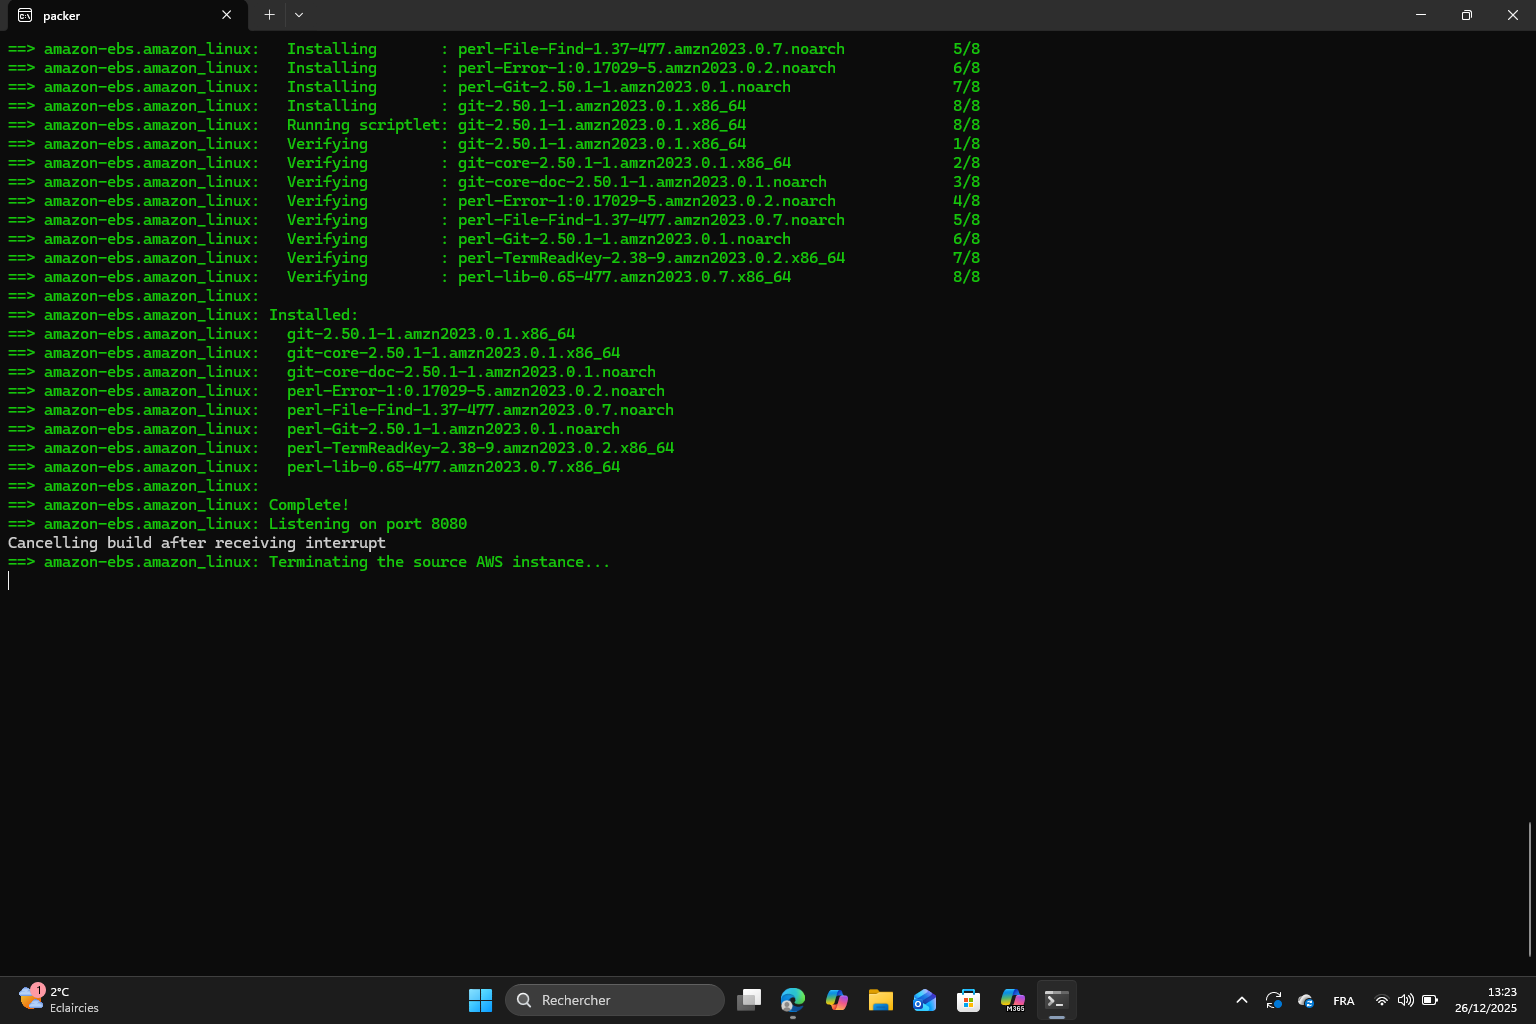
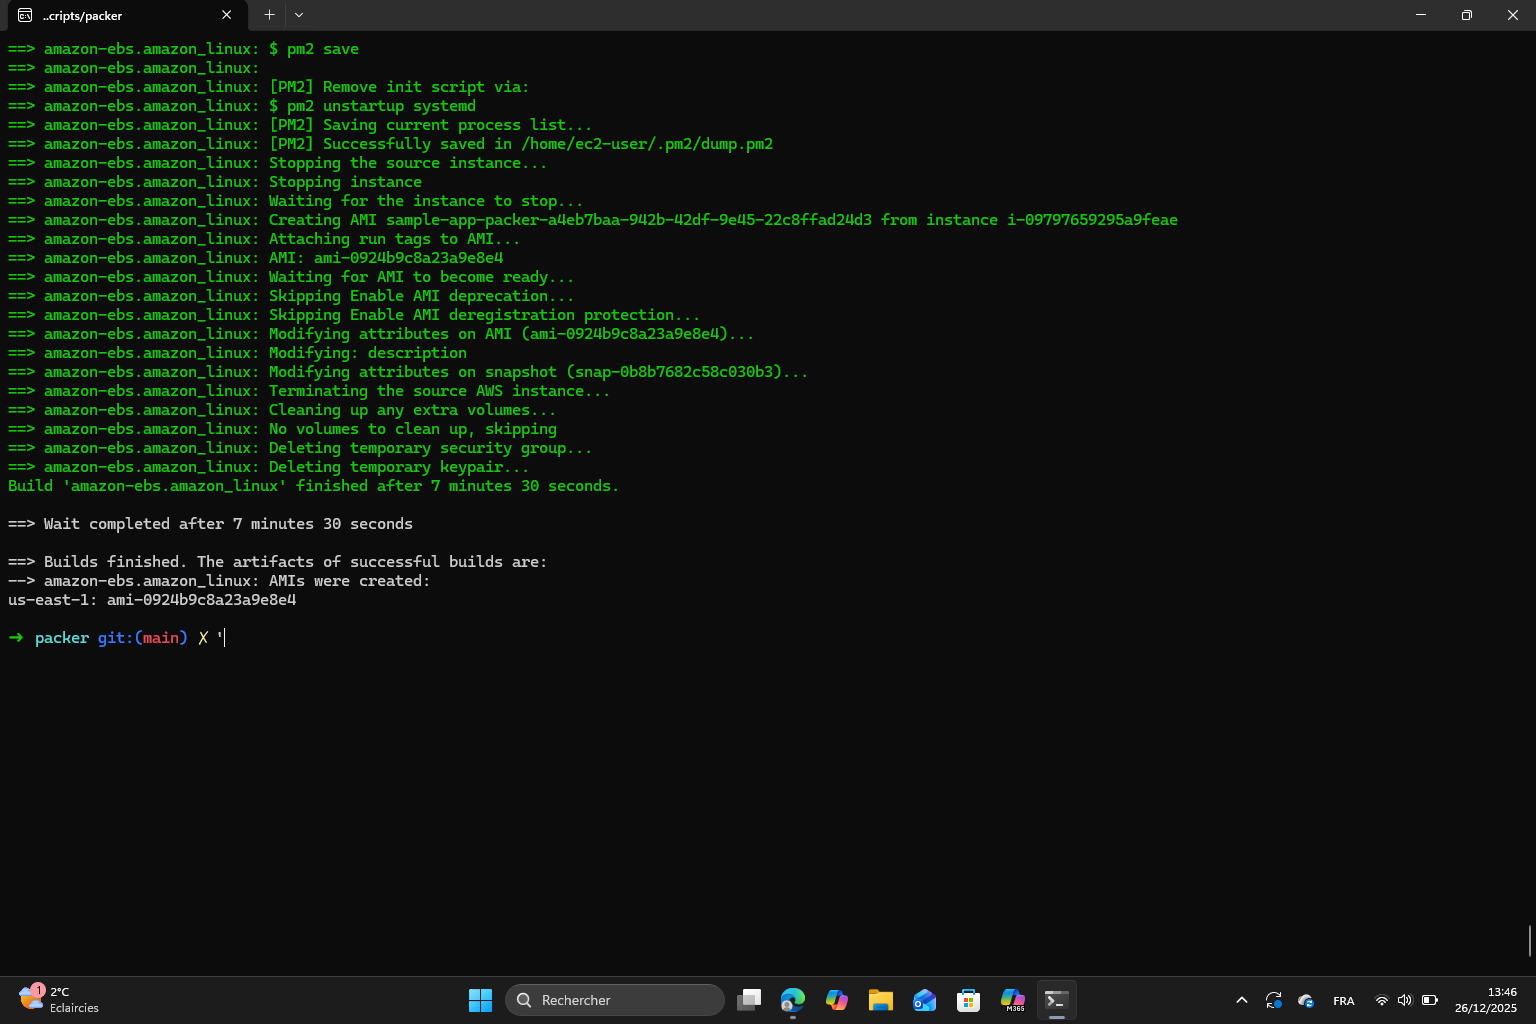
I created the directory structure and copied the Node.js sample app. Then, I initialized Packer and built the AMI. There’s a trap here because it seems like the app never starts although I waited for a very long time. I decided to interrupt the building :
I made some modifications to the code using an AI that advised me to install and use PM2. What I understand is that :
In the first version of the Packer script (the one provided in the lab paper) the app was simply copied to the instance and node.js was installed but the application was never automatically started. When launching an EC2 instance from the AMI, the server remained inaccessible because there was no process actually listening on port 8080.
In the corrected version, I use PM2 which is a Node.js process manager to automatically launch the application in the background and keep it running.
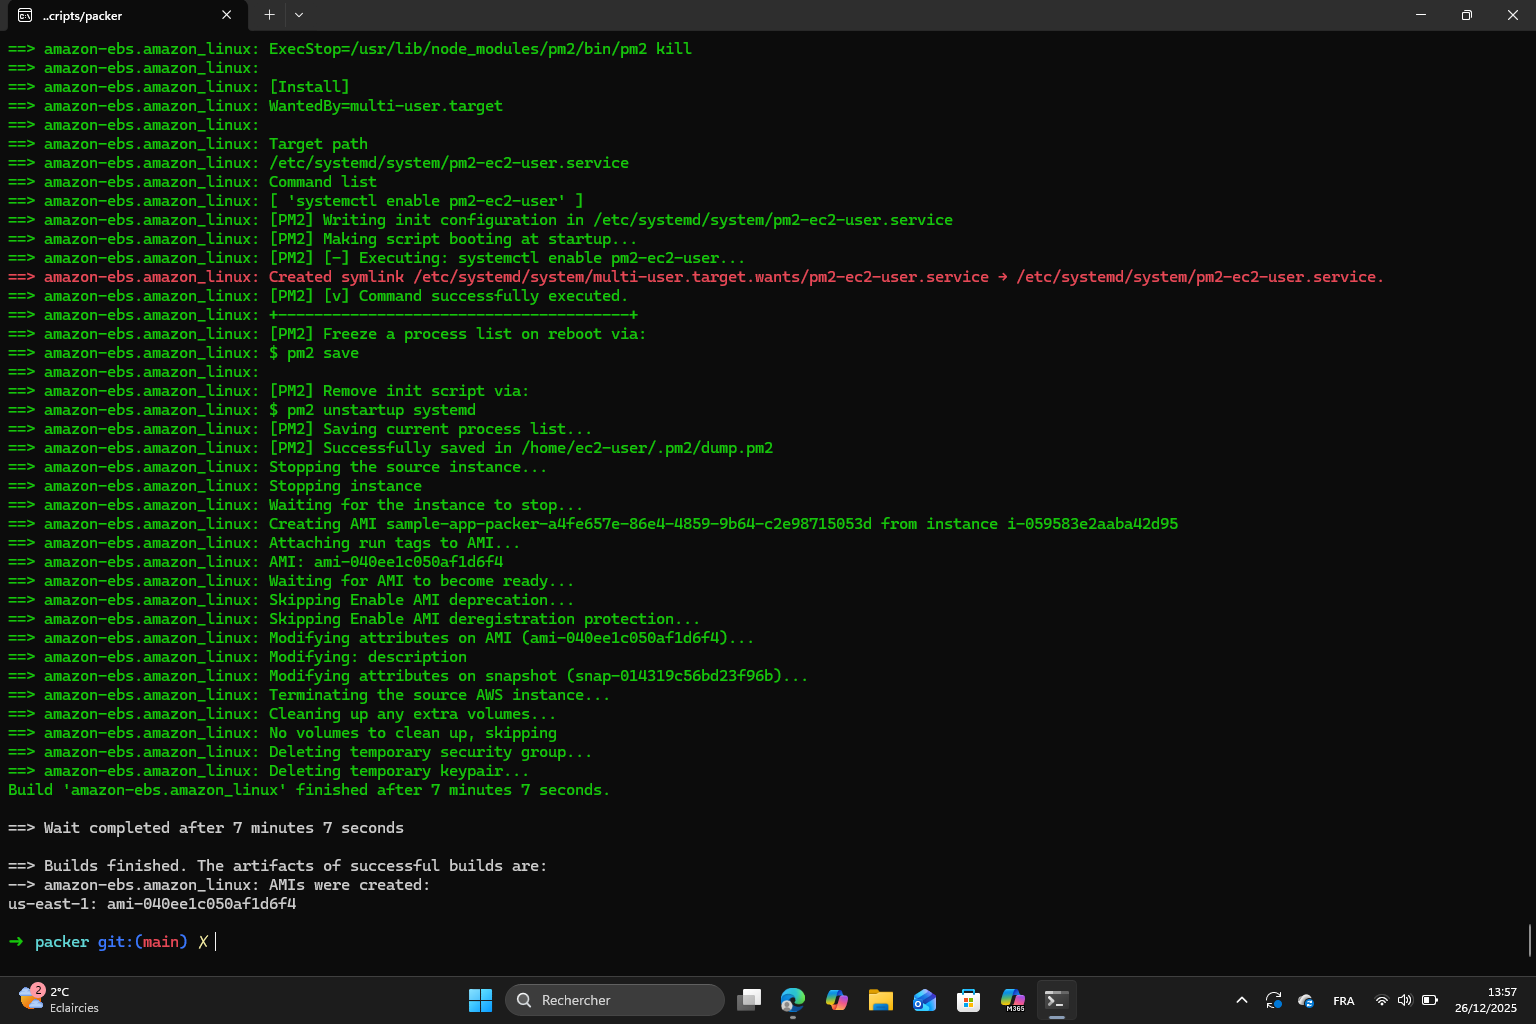
Exercise 5 : When we execute packer build a second time, a new AMI is created with a unique name. This is thanks to the ${uuidv4()} function in the ami_name field. This prevents naming conflicts and it allows multiple versions of AMIs to be existing at the same time.
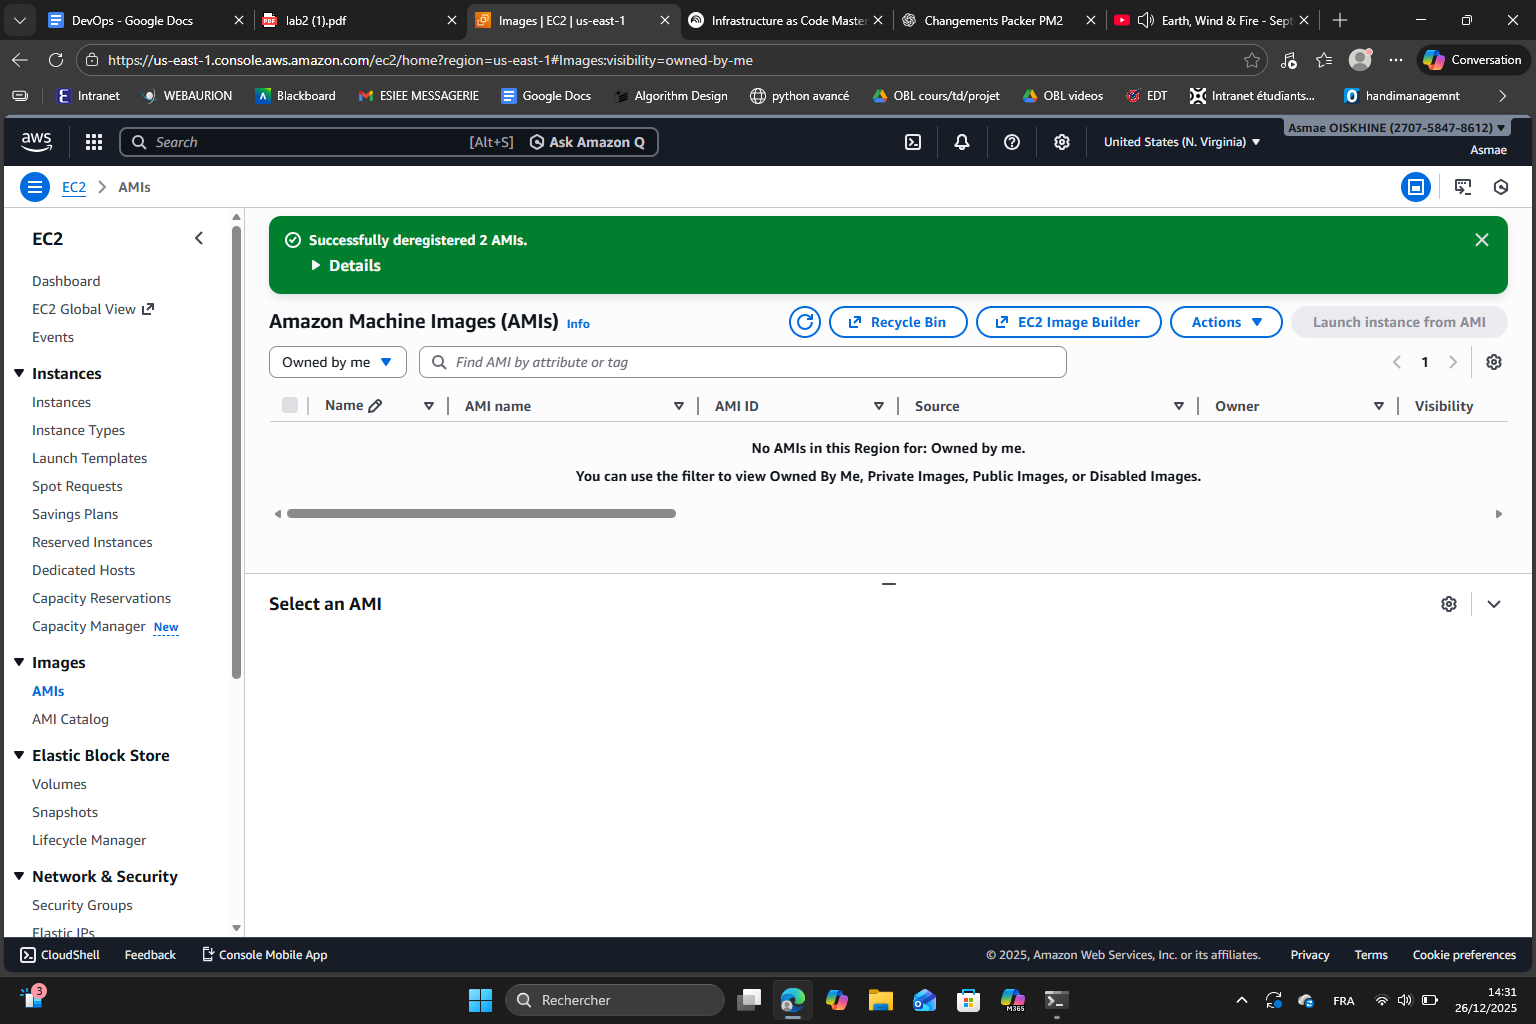
Here we can see the two AMIs created in the console :
Exercise 6 : To adapt the packer template to create a VirtualBox image, I followed the following steps (use of AI) :
Section 5 : Deploying, updating, and destroying an EC2 Instance using OpenTofu
In this section, the goal is to use OpenTofu to deploy an EC2 instance using the AMI created with Packer, update it and finally destroy it.
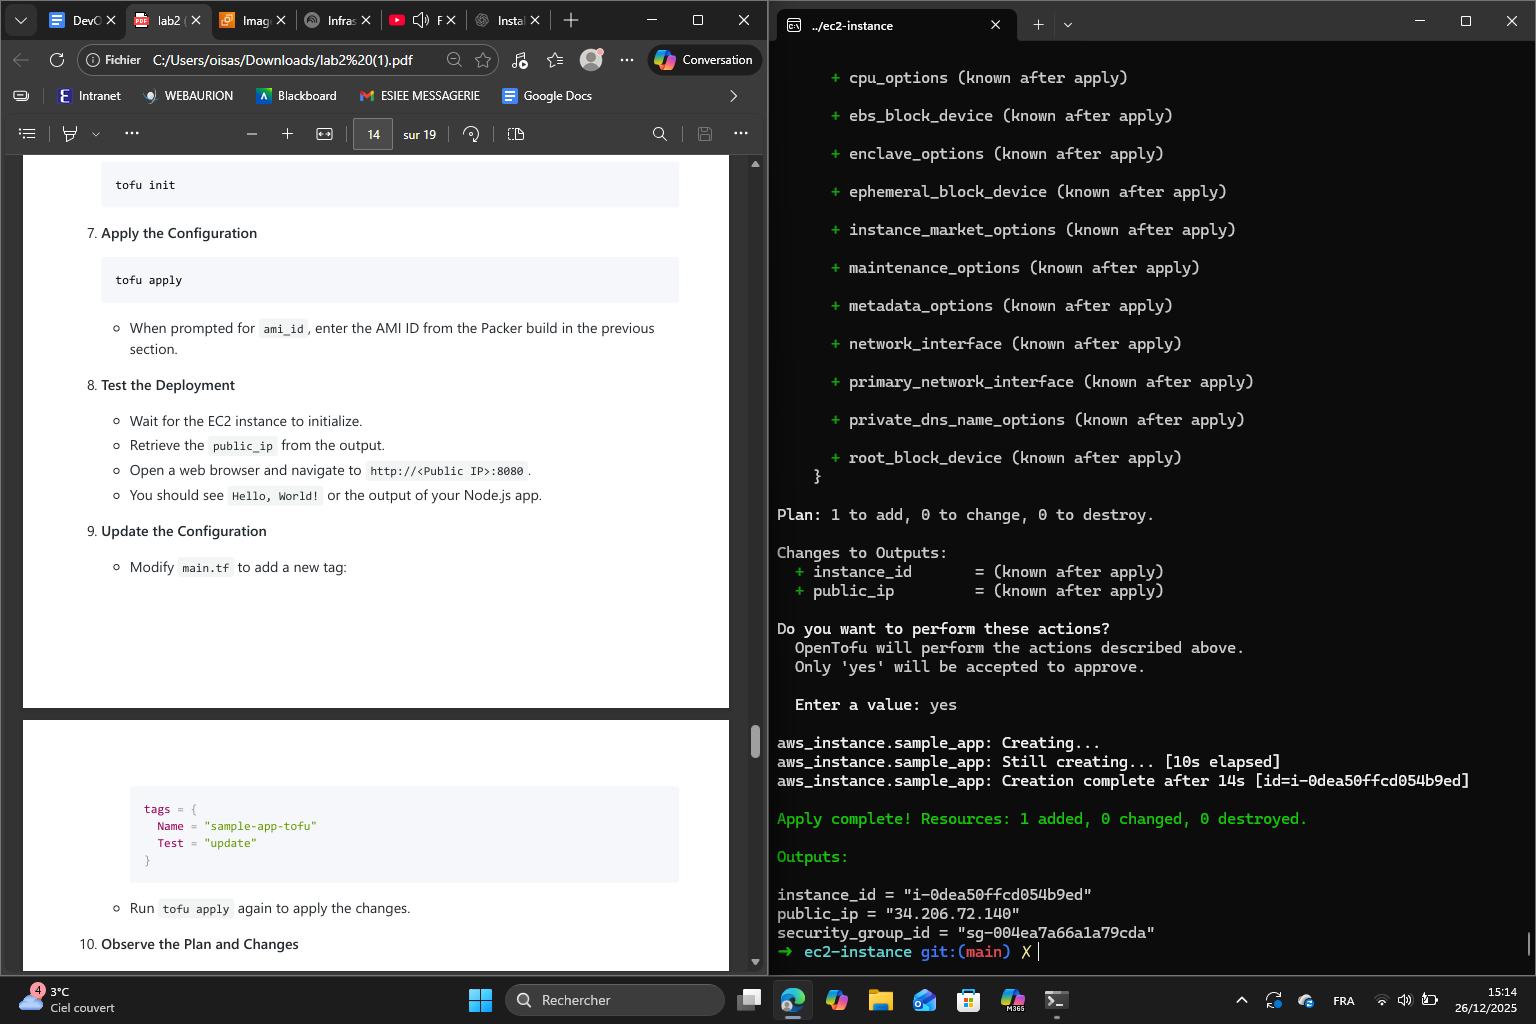
Once I finished all the directory and file steps, I encountered an error :
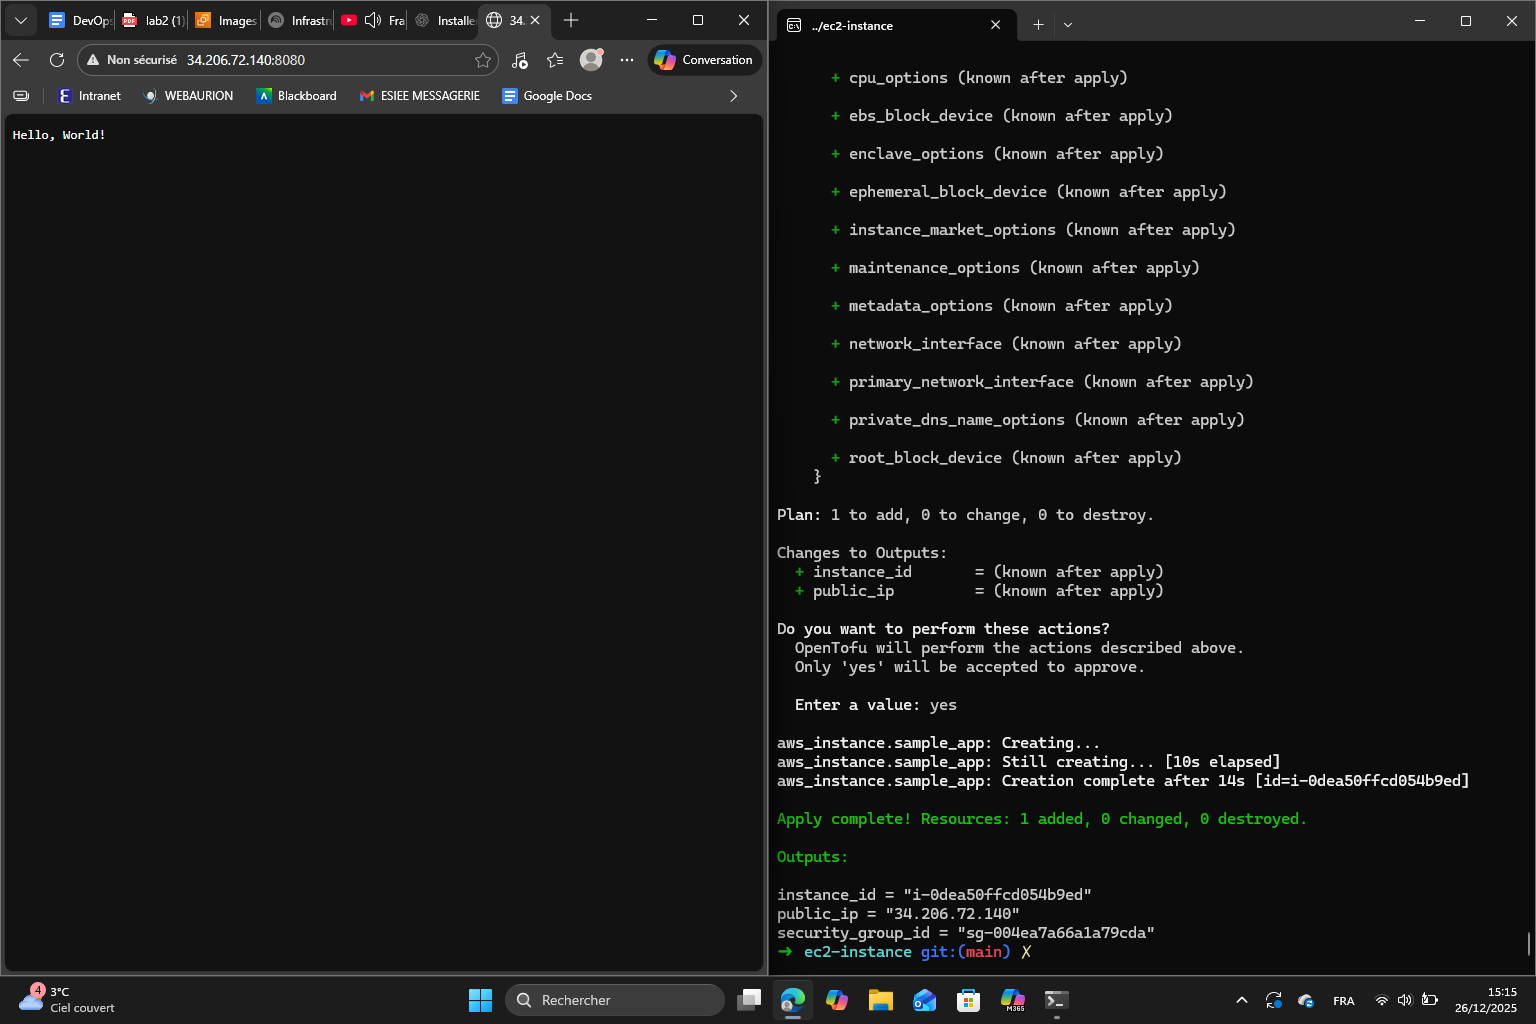
This is because I deregistered the AMI in the last section. I created a new AMI : ami-0edd03f918a959b78 and this is the result following the configuration apply :
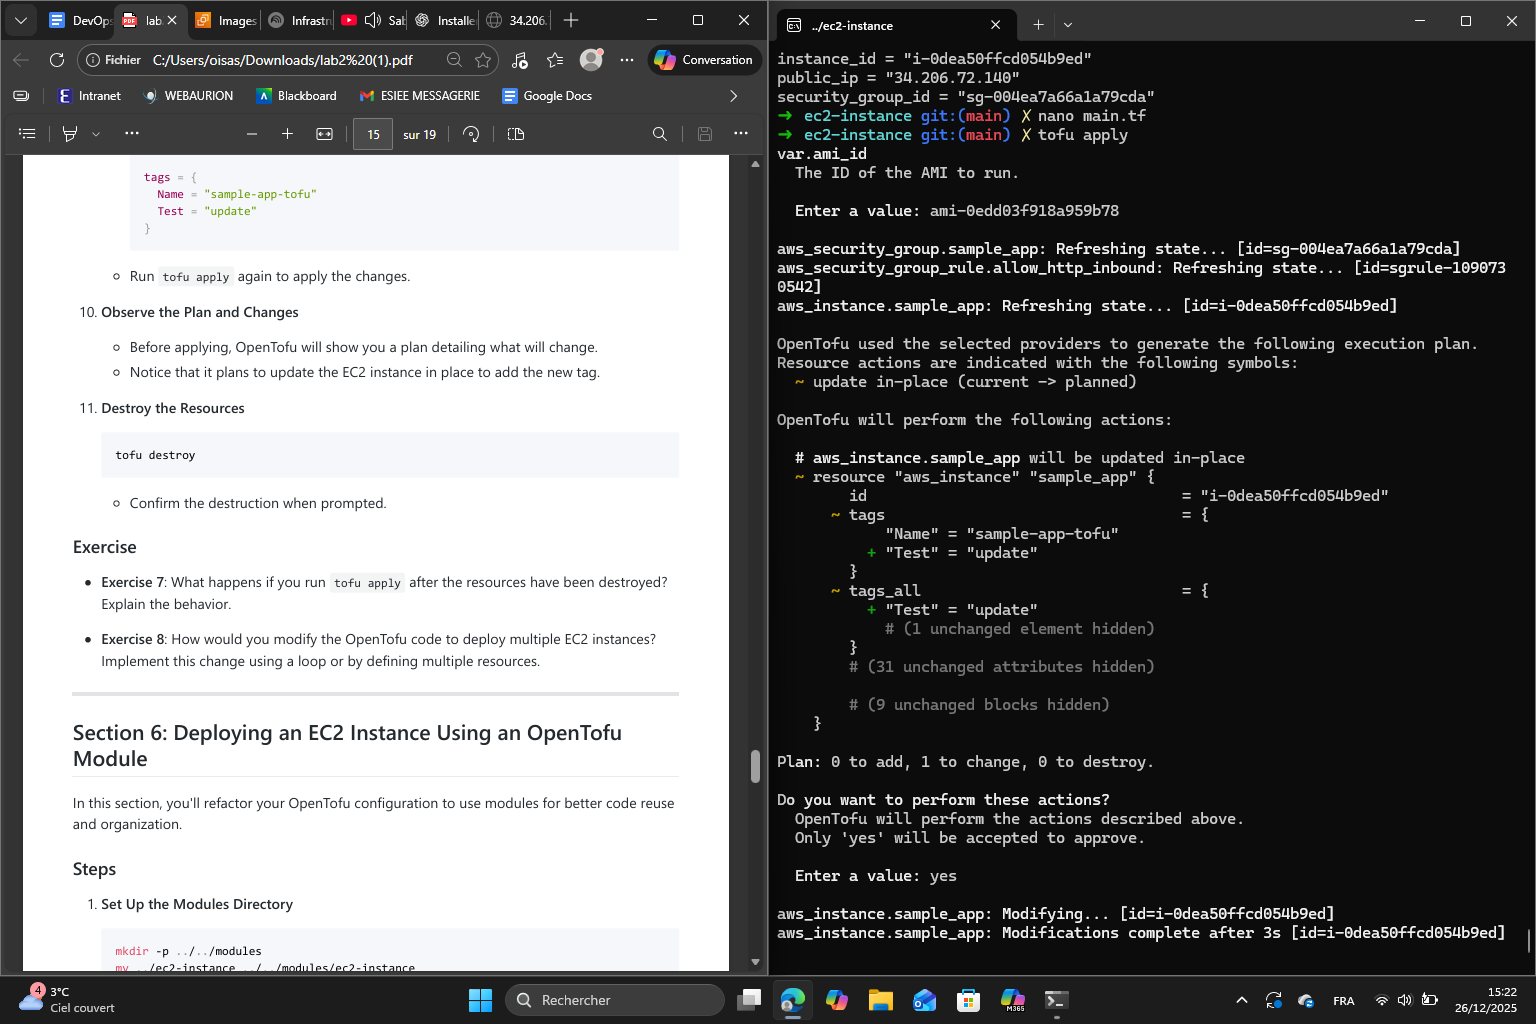
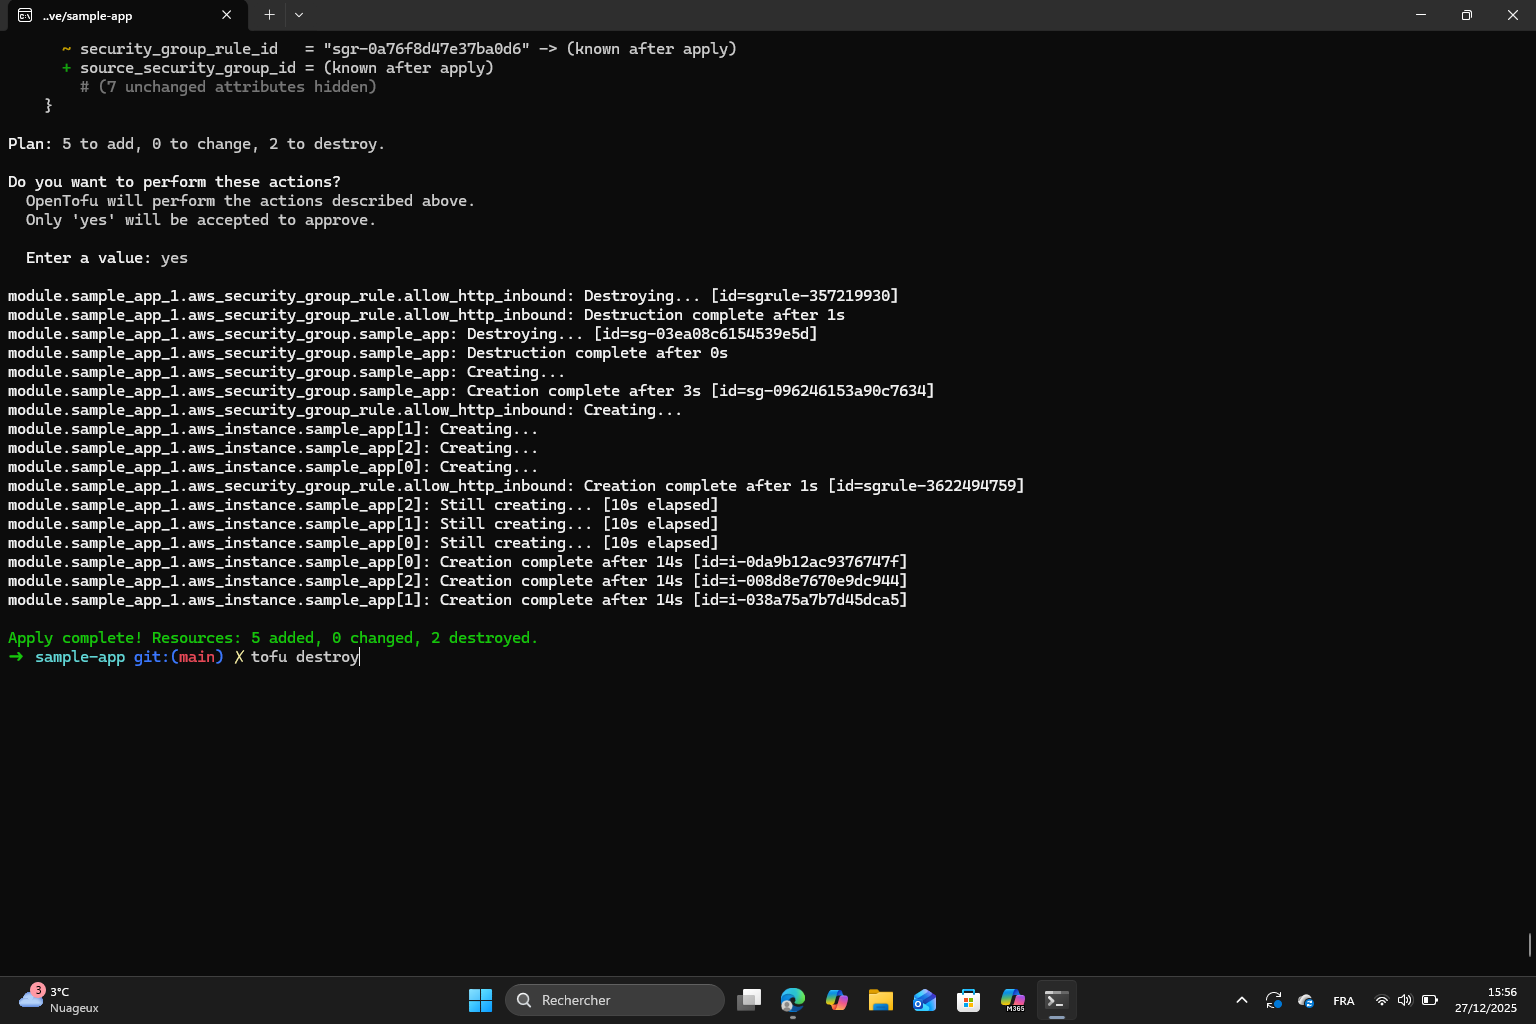
Then, I updated the EC2 instance by bringing modifications to the main.tf. Here are the plan and changes obtained :
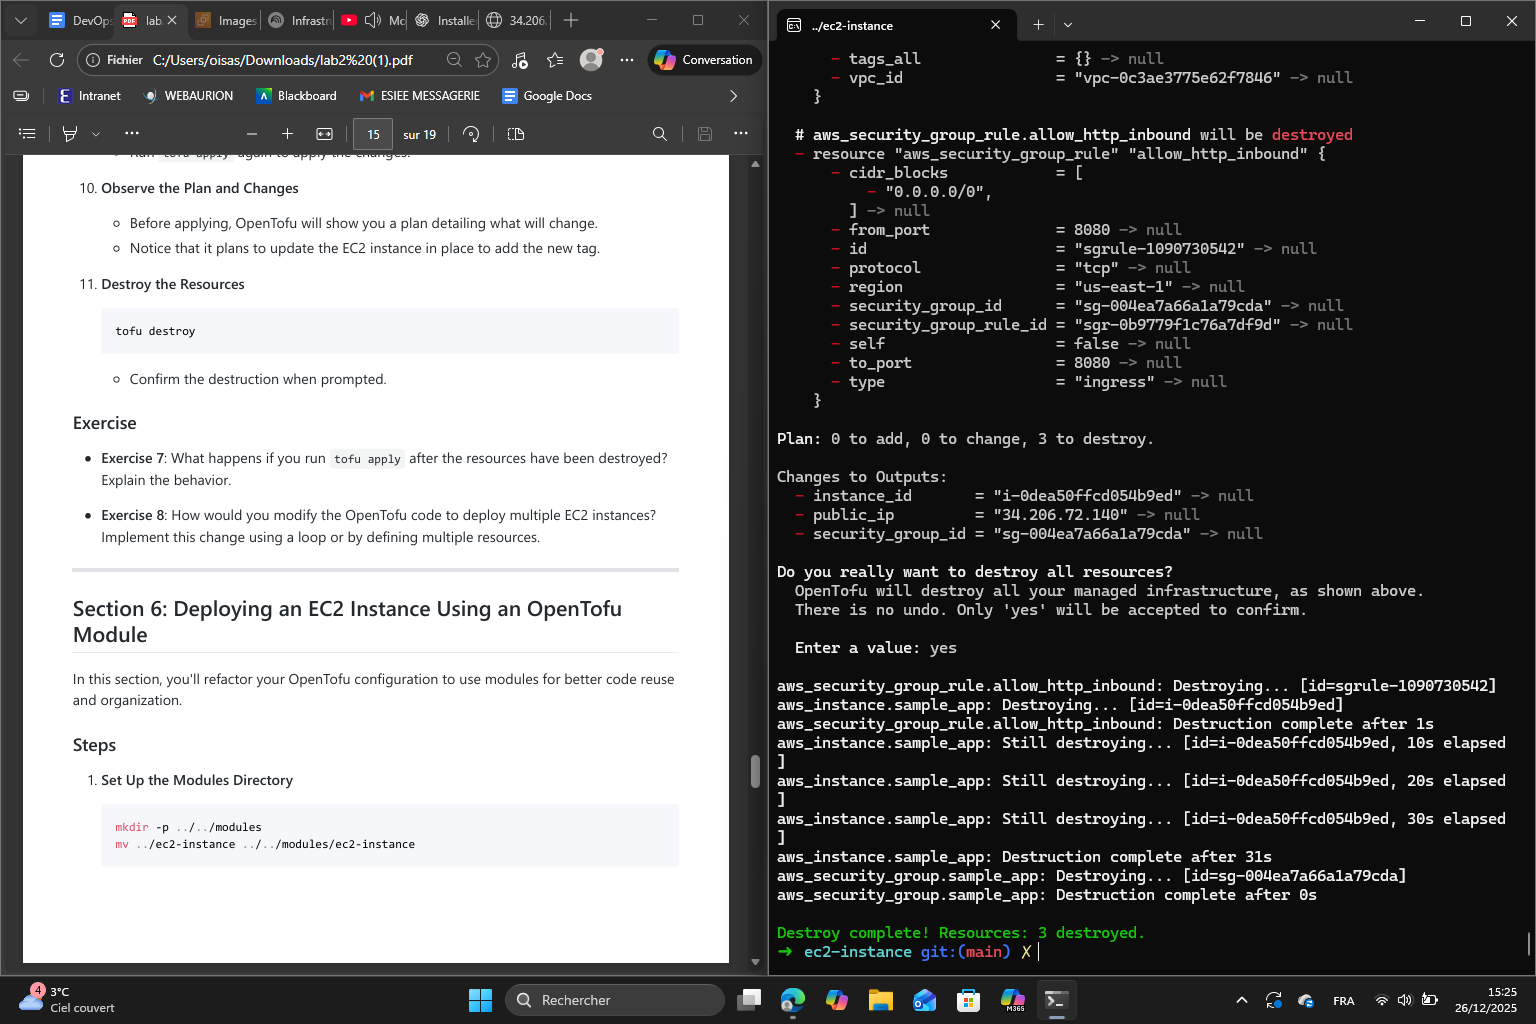
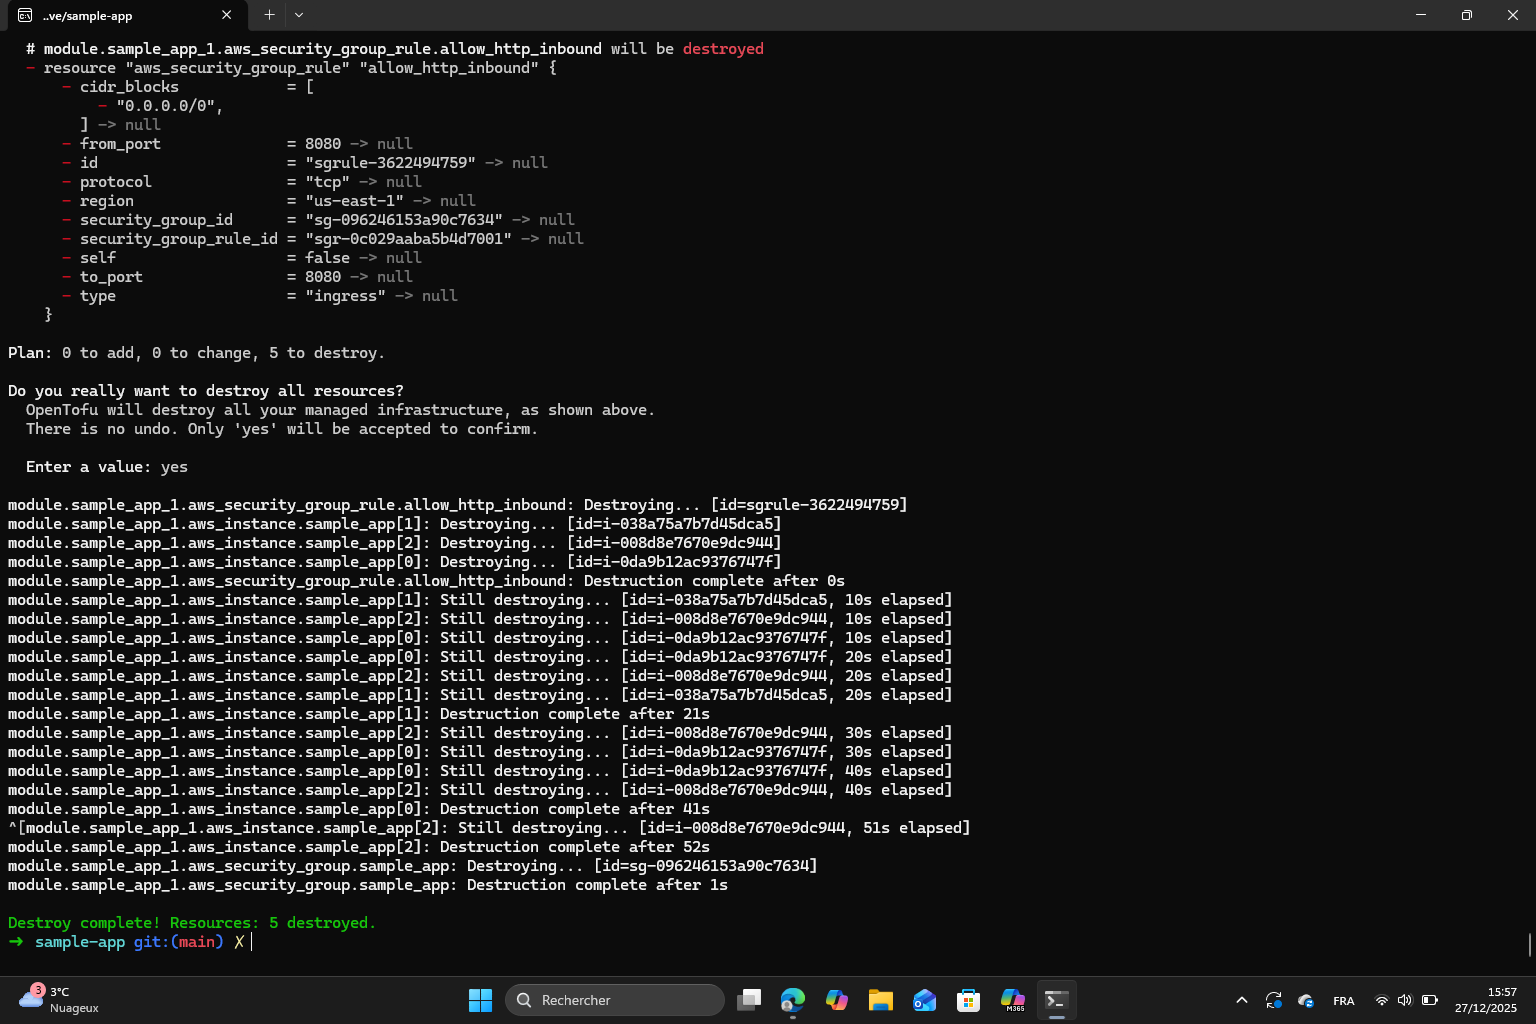
Finally, I destroyed the resources :
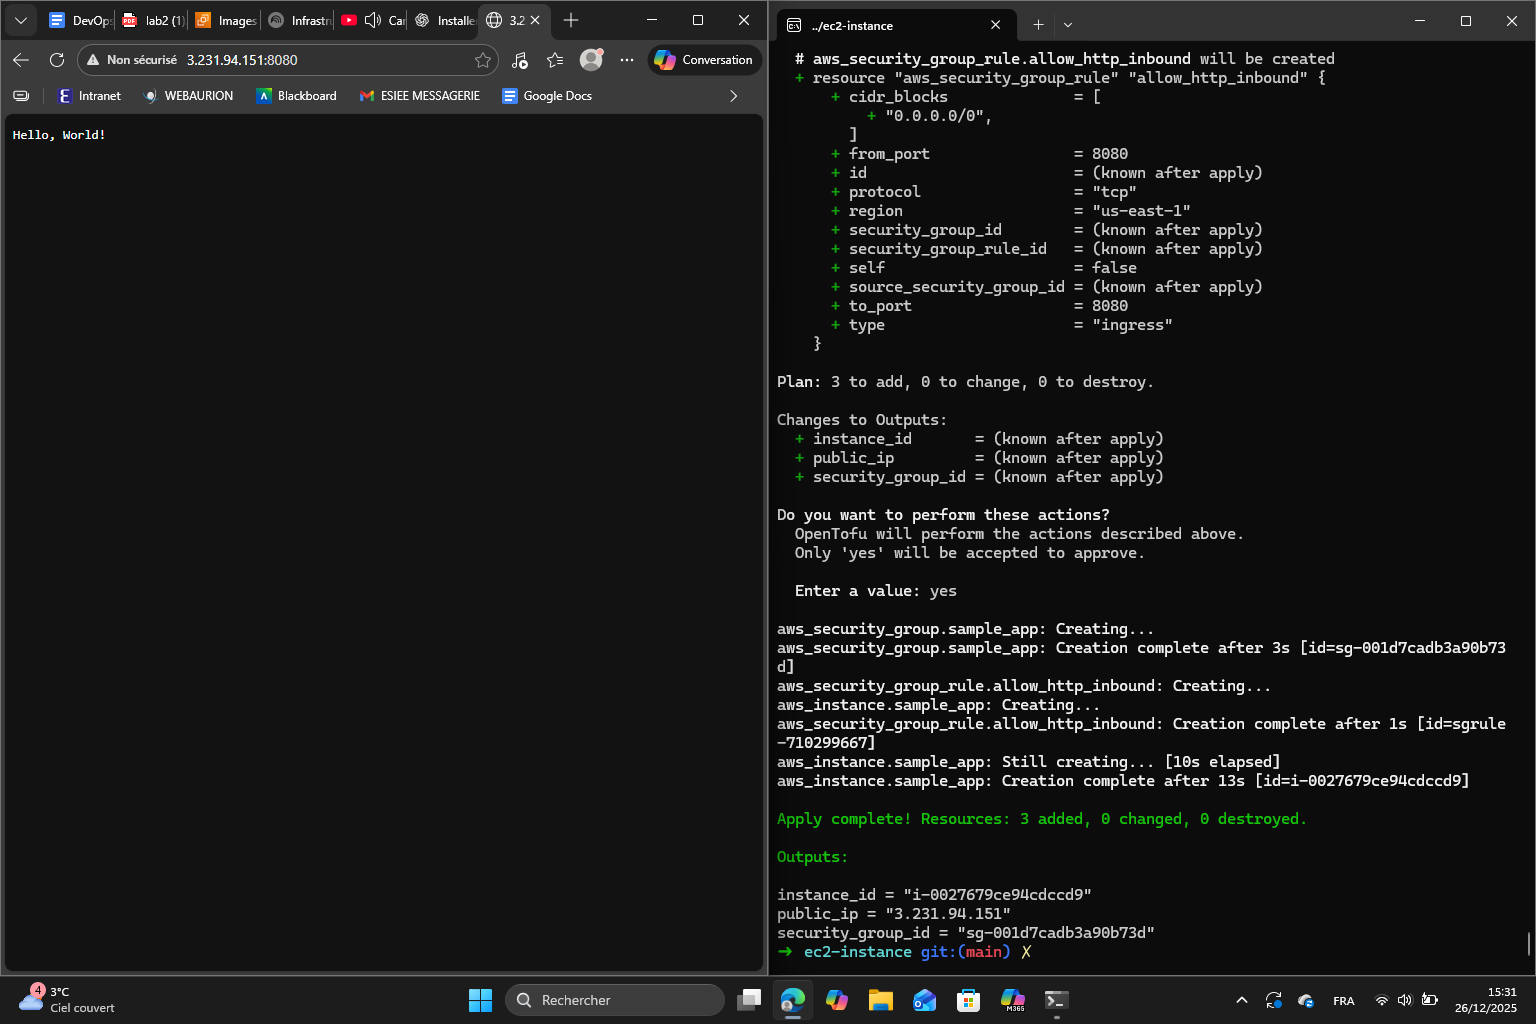
Exercise 7 : I destroyed the resources but the AMI and the main.tf are still present so tofu is simply going to recreate all the resources from scratch just like it did the first time.
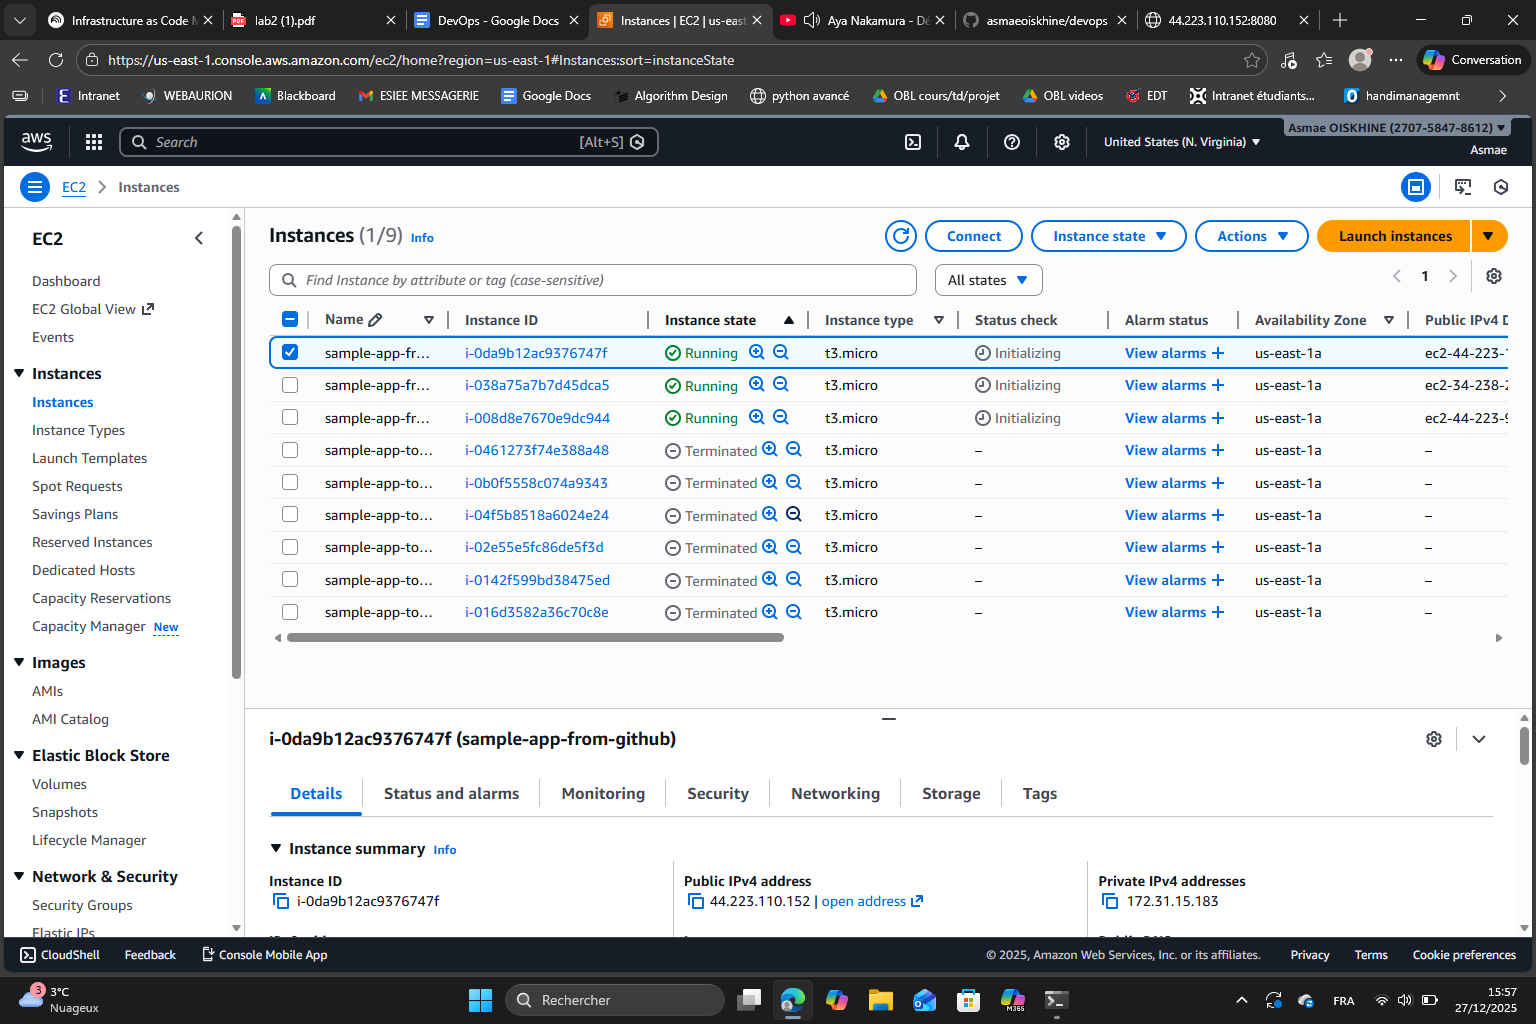
I obtain a new public IP and I can use it to access the output of the app.
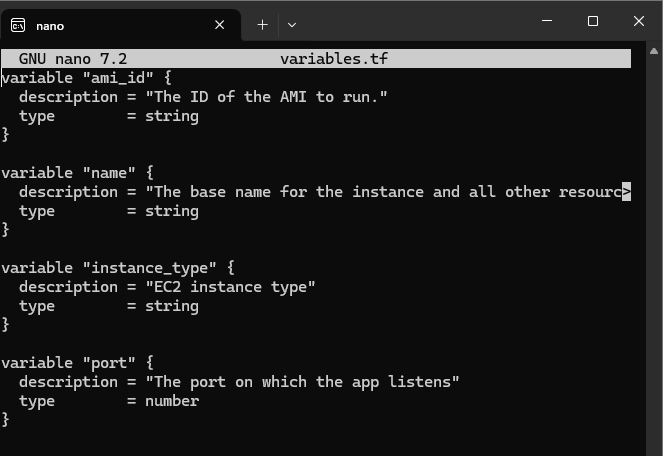
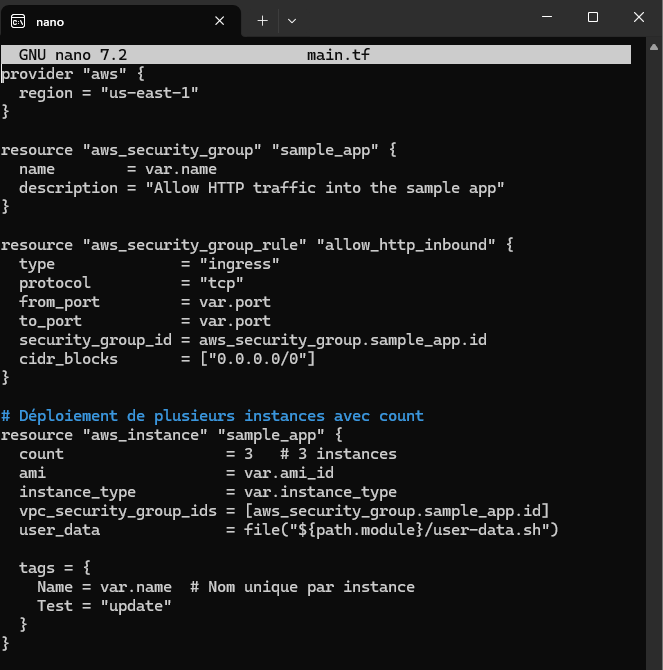
Exercise 8 : In main.tf, all I need to do is add count = n to create n instances (I chose to create 3) and define a unique name for each instance by using the following code line : Name = "sample-app-tofu-${count.index + 1}". Then, I need to make sure the output is compatible with all the instances. To do this, I modified the outputs.tf file like this :
output "instance_ids" { description = "The IDs of the EC2 instances" value = [for inst in aws_instance.sample_app : inst.id]}output "security_group_id" { description = "The ID of the security group" value = aws_security_group.sample_app.id}output "public_ips" { description = "The public IPs of the EC2 instances" value = [for inst in aws_instance.sample_app : inst.public_ip]}
Then we execute tofu init and tofu apply :
Section 6 : Deploying an EC2 Instance Using an OpenTofu Module
The goal of this section is to refactor our OpenTofu configuration to use modules which improves organization and the capacity to reuse code more easily. Instead of duplicating EC2 definitions, we can define them once in a module and then reuse them multiple times with different parameters.
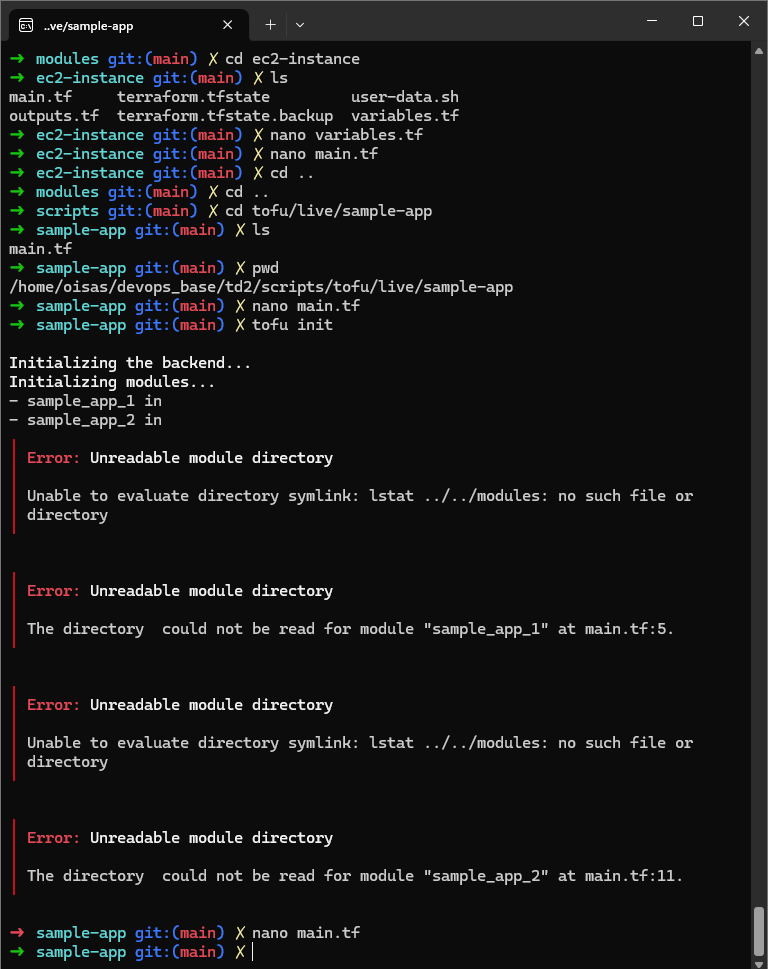
Once all the directory/files steps are done, I initialized OpenTofu but got an error :
This is because in the original script the directory link isn’t right : ../../modules/ec2-instance. The correct link was : ../../../modules/ec2-instance
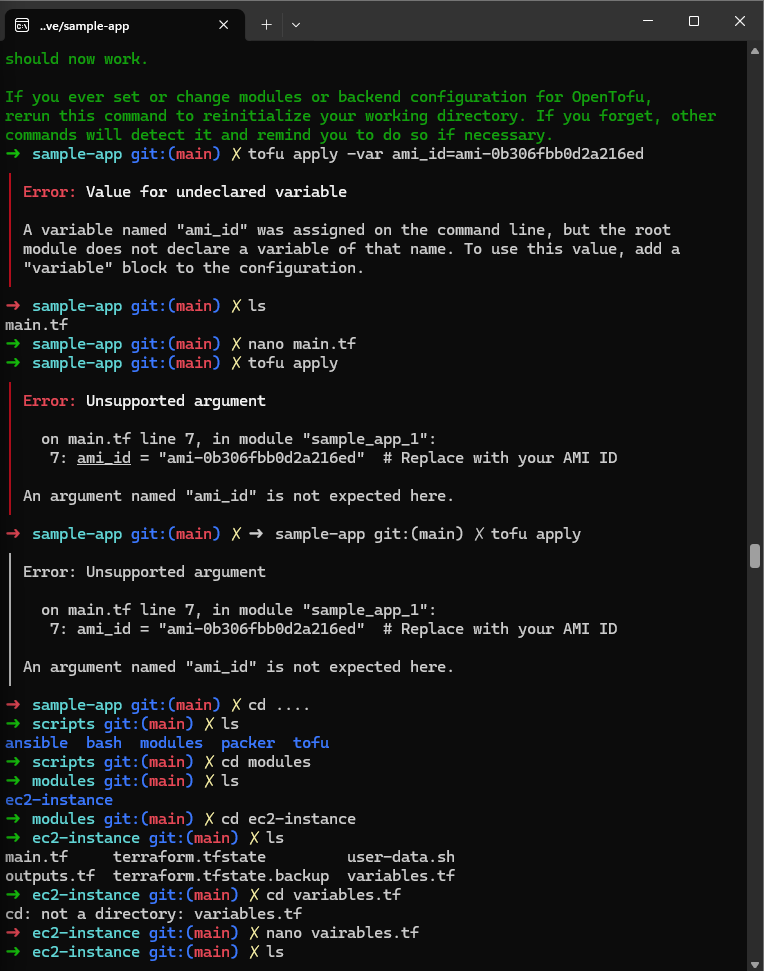
After that, I initialized OpenTofu but got a new error once again :
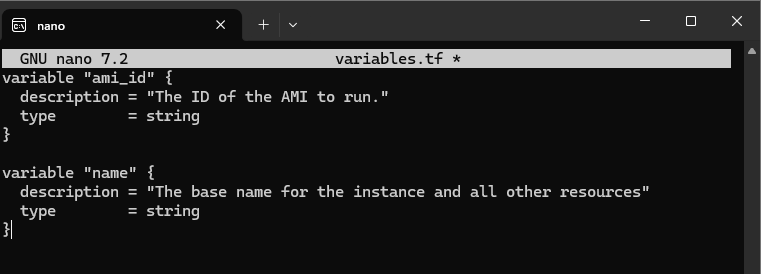
This is because in variables.tf, I didn’t add the ami_id variable :
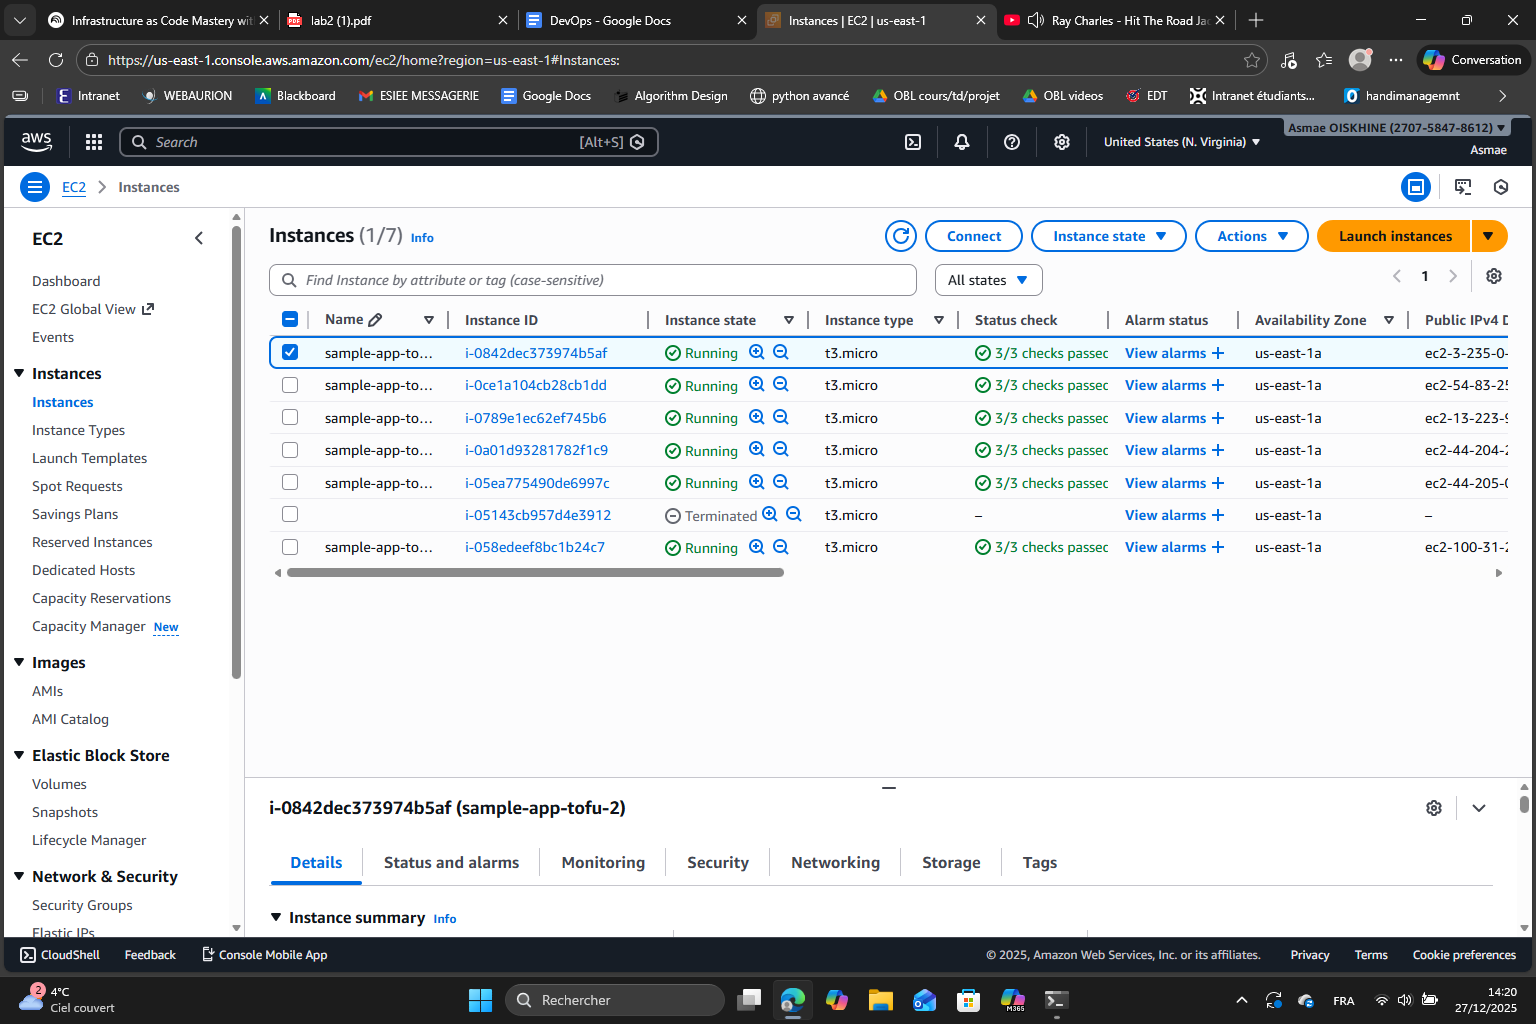
Finally, it worked. Note that I have 6 instances because I kept count = 3 so each module call creates 3 instances and because we call it 2 times I have 3×2 = 6 instances.
For each instance, thanks to the public IP, I can see the output of the app :
Exercise 9 :
In the module :
In variables.tf I declared two new input variables :
instance_type : allows us to select an instance size
port : allows us to define the port on which the security group should allow traffic
Then, in main.tf I updated the resources to use these variables :
in the resource aws_instance, the argument instance_type now uses var.instance_type
in the resource aws_security_group_rule, the arguments from_port and to_port now use var.port
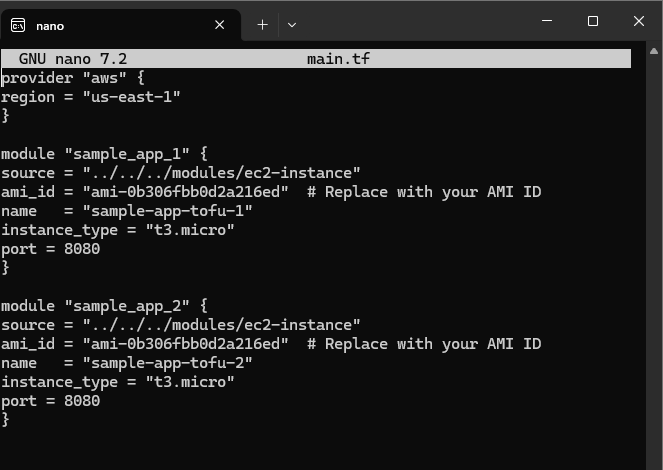
In the root module, the sample_app_1 and sample_app_2 blocks are also updated to include the new arguments :
Exercise 10 : already done because I kept what I did in exercise 8.
Section 7 : Using OpenTofu modules from GitHub
The goal of this section is to learn how to use OpenTofu modules hosted on GitHub instead of relying only on local modules.
First, I had to push the td2 in GitHub as I didn’t do it before. Then I corrected the script to include my GitHub repository details and my path to the ec2-instance.
Then I initialized OpenTofu, applied the configuration and here is the result :
Melchior’s exercise 11:
We add a commit to output that makes tofu output a revision marker
output "module_revision" { description = "Manual revision marker to demonstrate module version" value = "rev-1"}
The main point I remember from this section is that using OpenTofu modules from GitHub allows me to share the infrastructure code with my team and maintain the versions throughout a project. This will be extremely useful for the final project.
Conclusion
During this lab, I explored the concept of Infrastructure as Code (IaC) and its role in DevOps. I discovered how to manage an infrastructure in different ways : I began with ad hoc bash scripts which allowed quick automation but revealed limitations such as a lack of idempotency. Then I used Ansible to introduce configuration management and idempotent operations. With Packer, I learned how to create my own reusable machine images (AMI). Finally, I used OpenTofu to deploy, update and destroy infrastructures and learned how to organize things into modules both local and hosted on GitHub. This modular organization allowed the code to be easily reusable.
Of course, I also got my mind a little more clear on what an infrastructure really is and what are the different elements that compose an infrastructure : in this lab, I mainly learned about EC2 instances, security groups, AMI, IAM users, tags and networking resources (like the public IPs for example).